Archive for the ‘Terrain’ Category

IT’s FINALLY FINISHED!!!!!!

Wow, this has been a monster project and one of the coolest looking pieces of terrain I have worked on to date. It is a massive center piece for any gaming table – the first time this went to the club it was the first thing everyone went to look at.

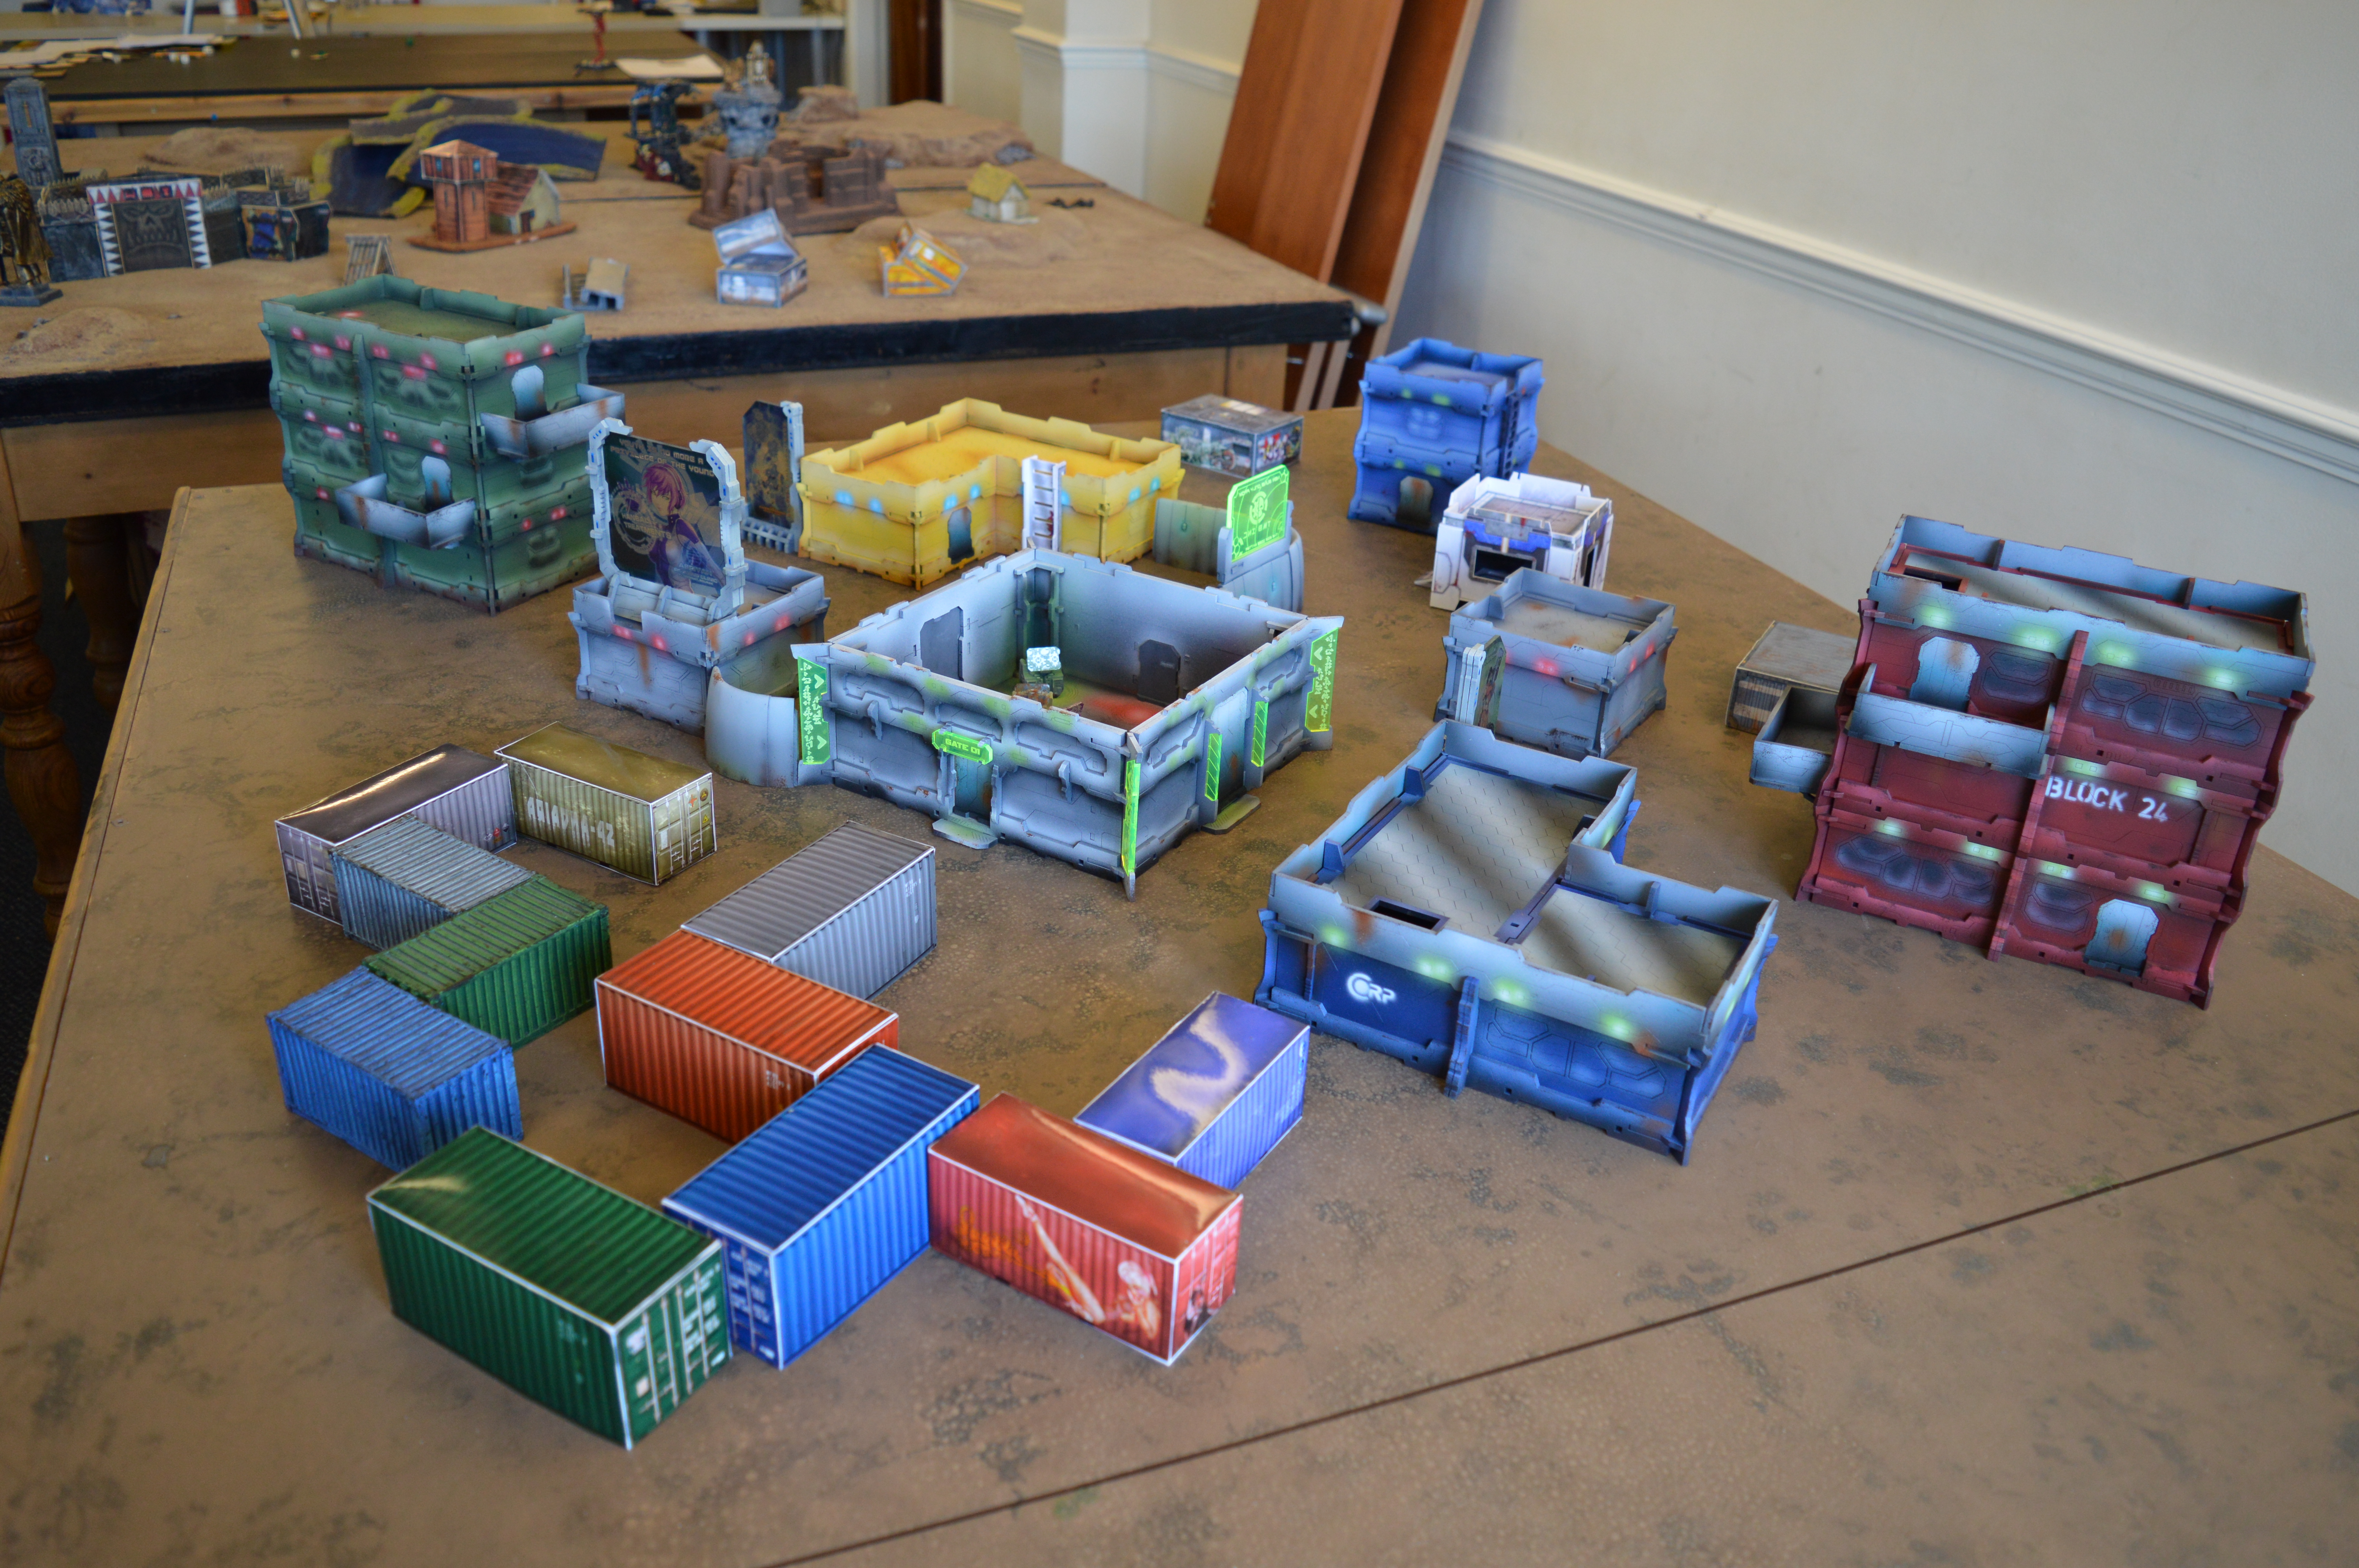
So let’s have a look at the details:

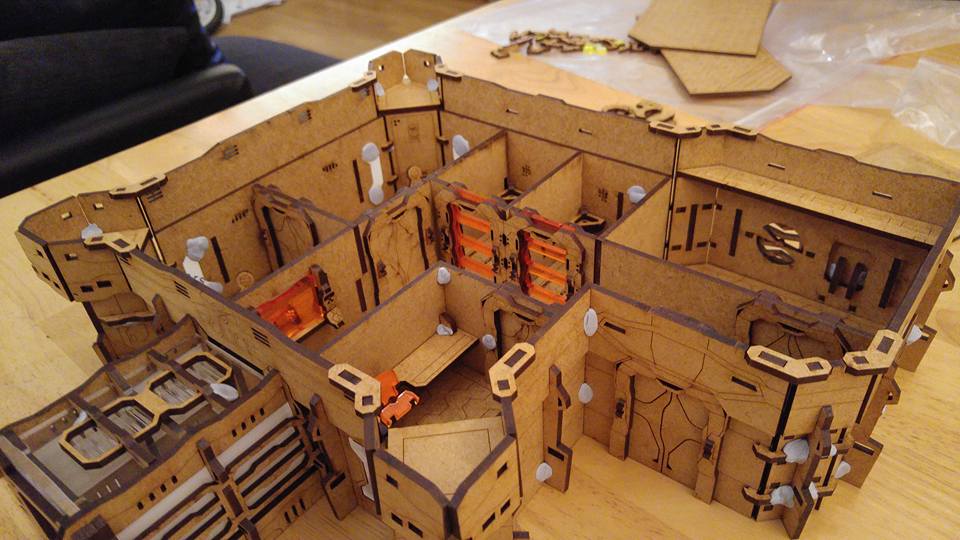
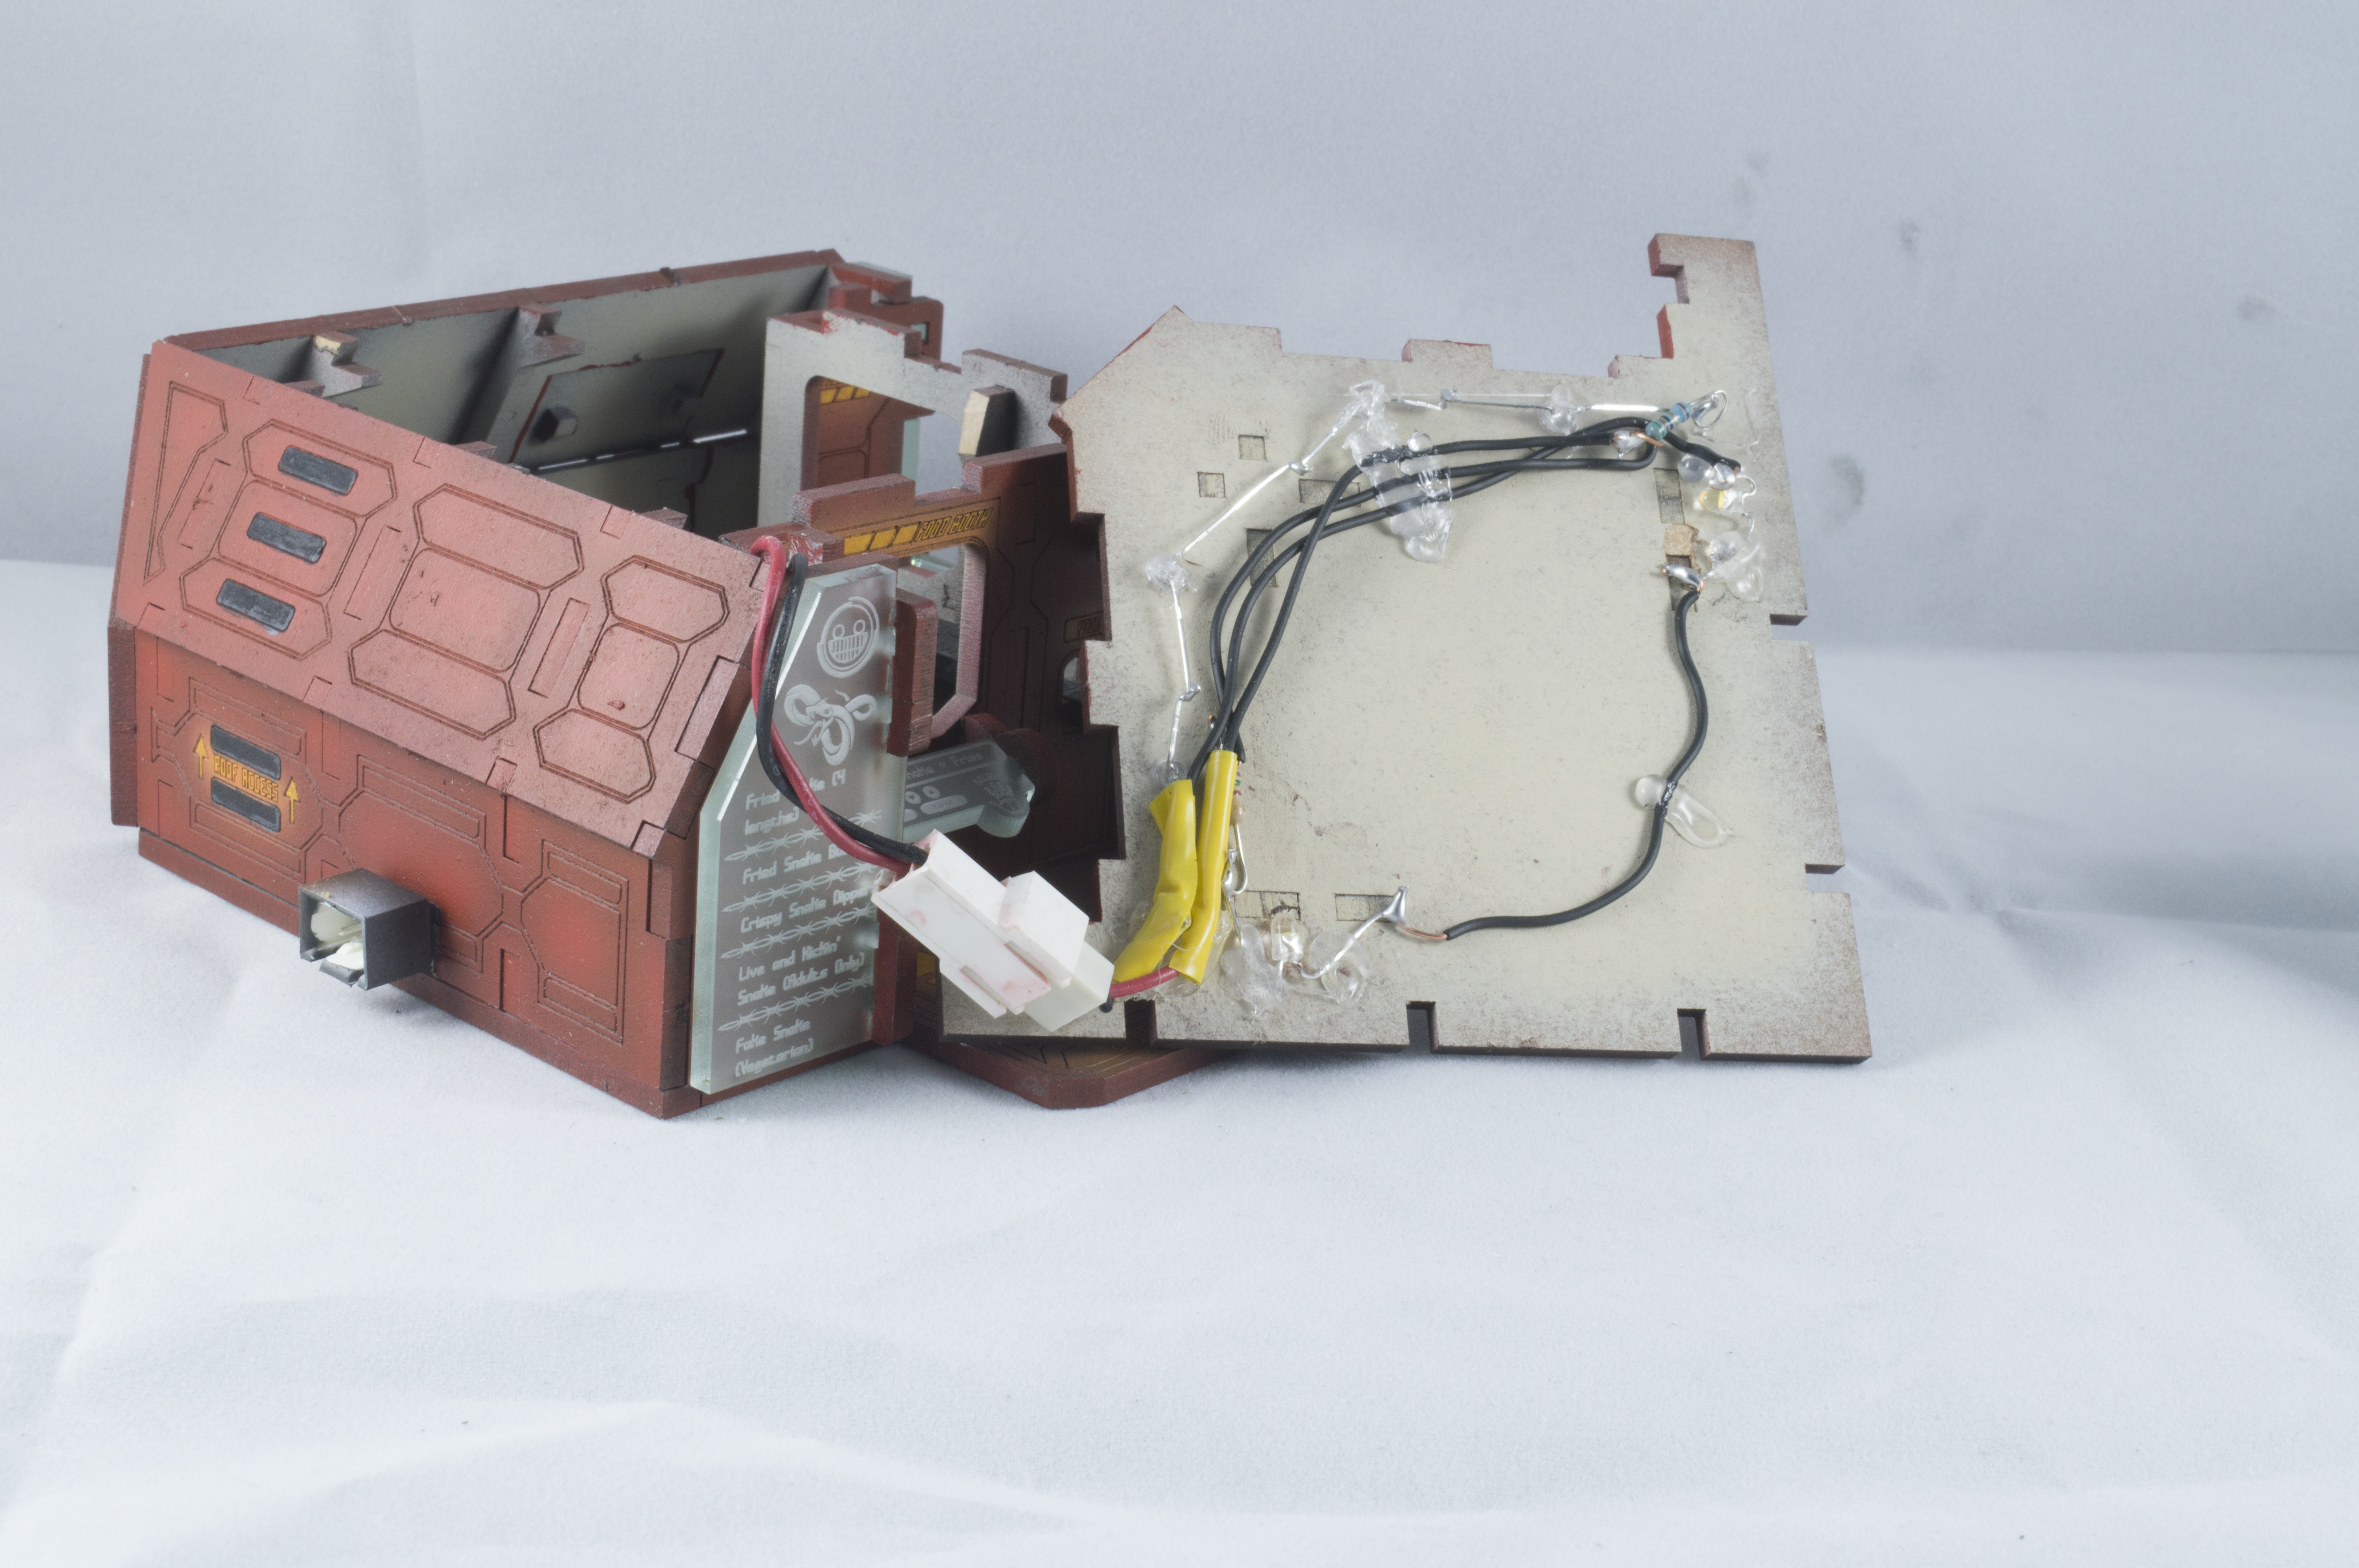
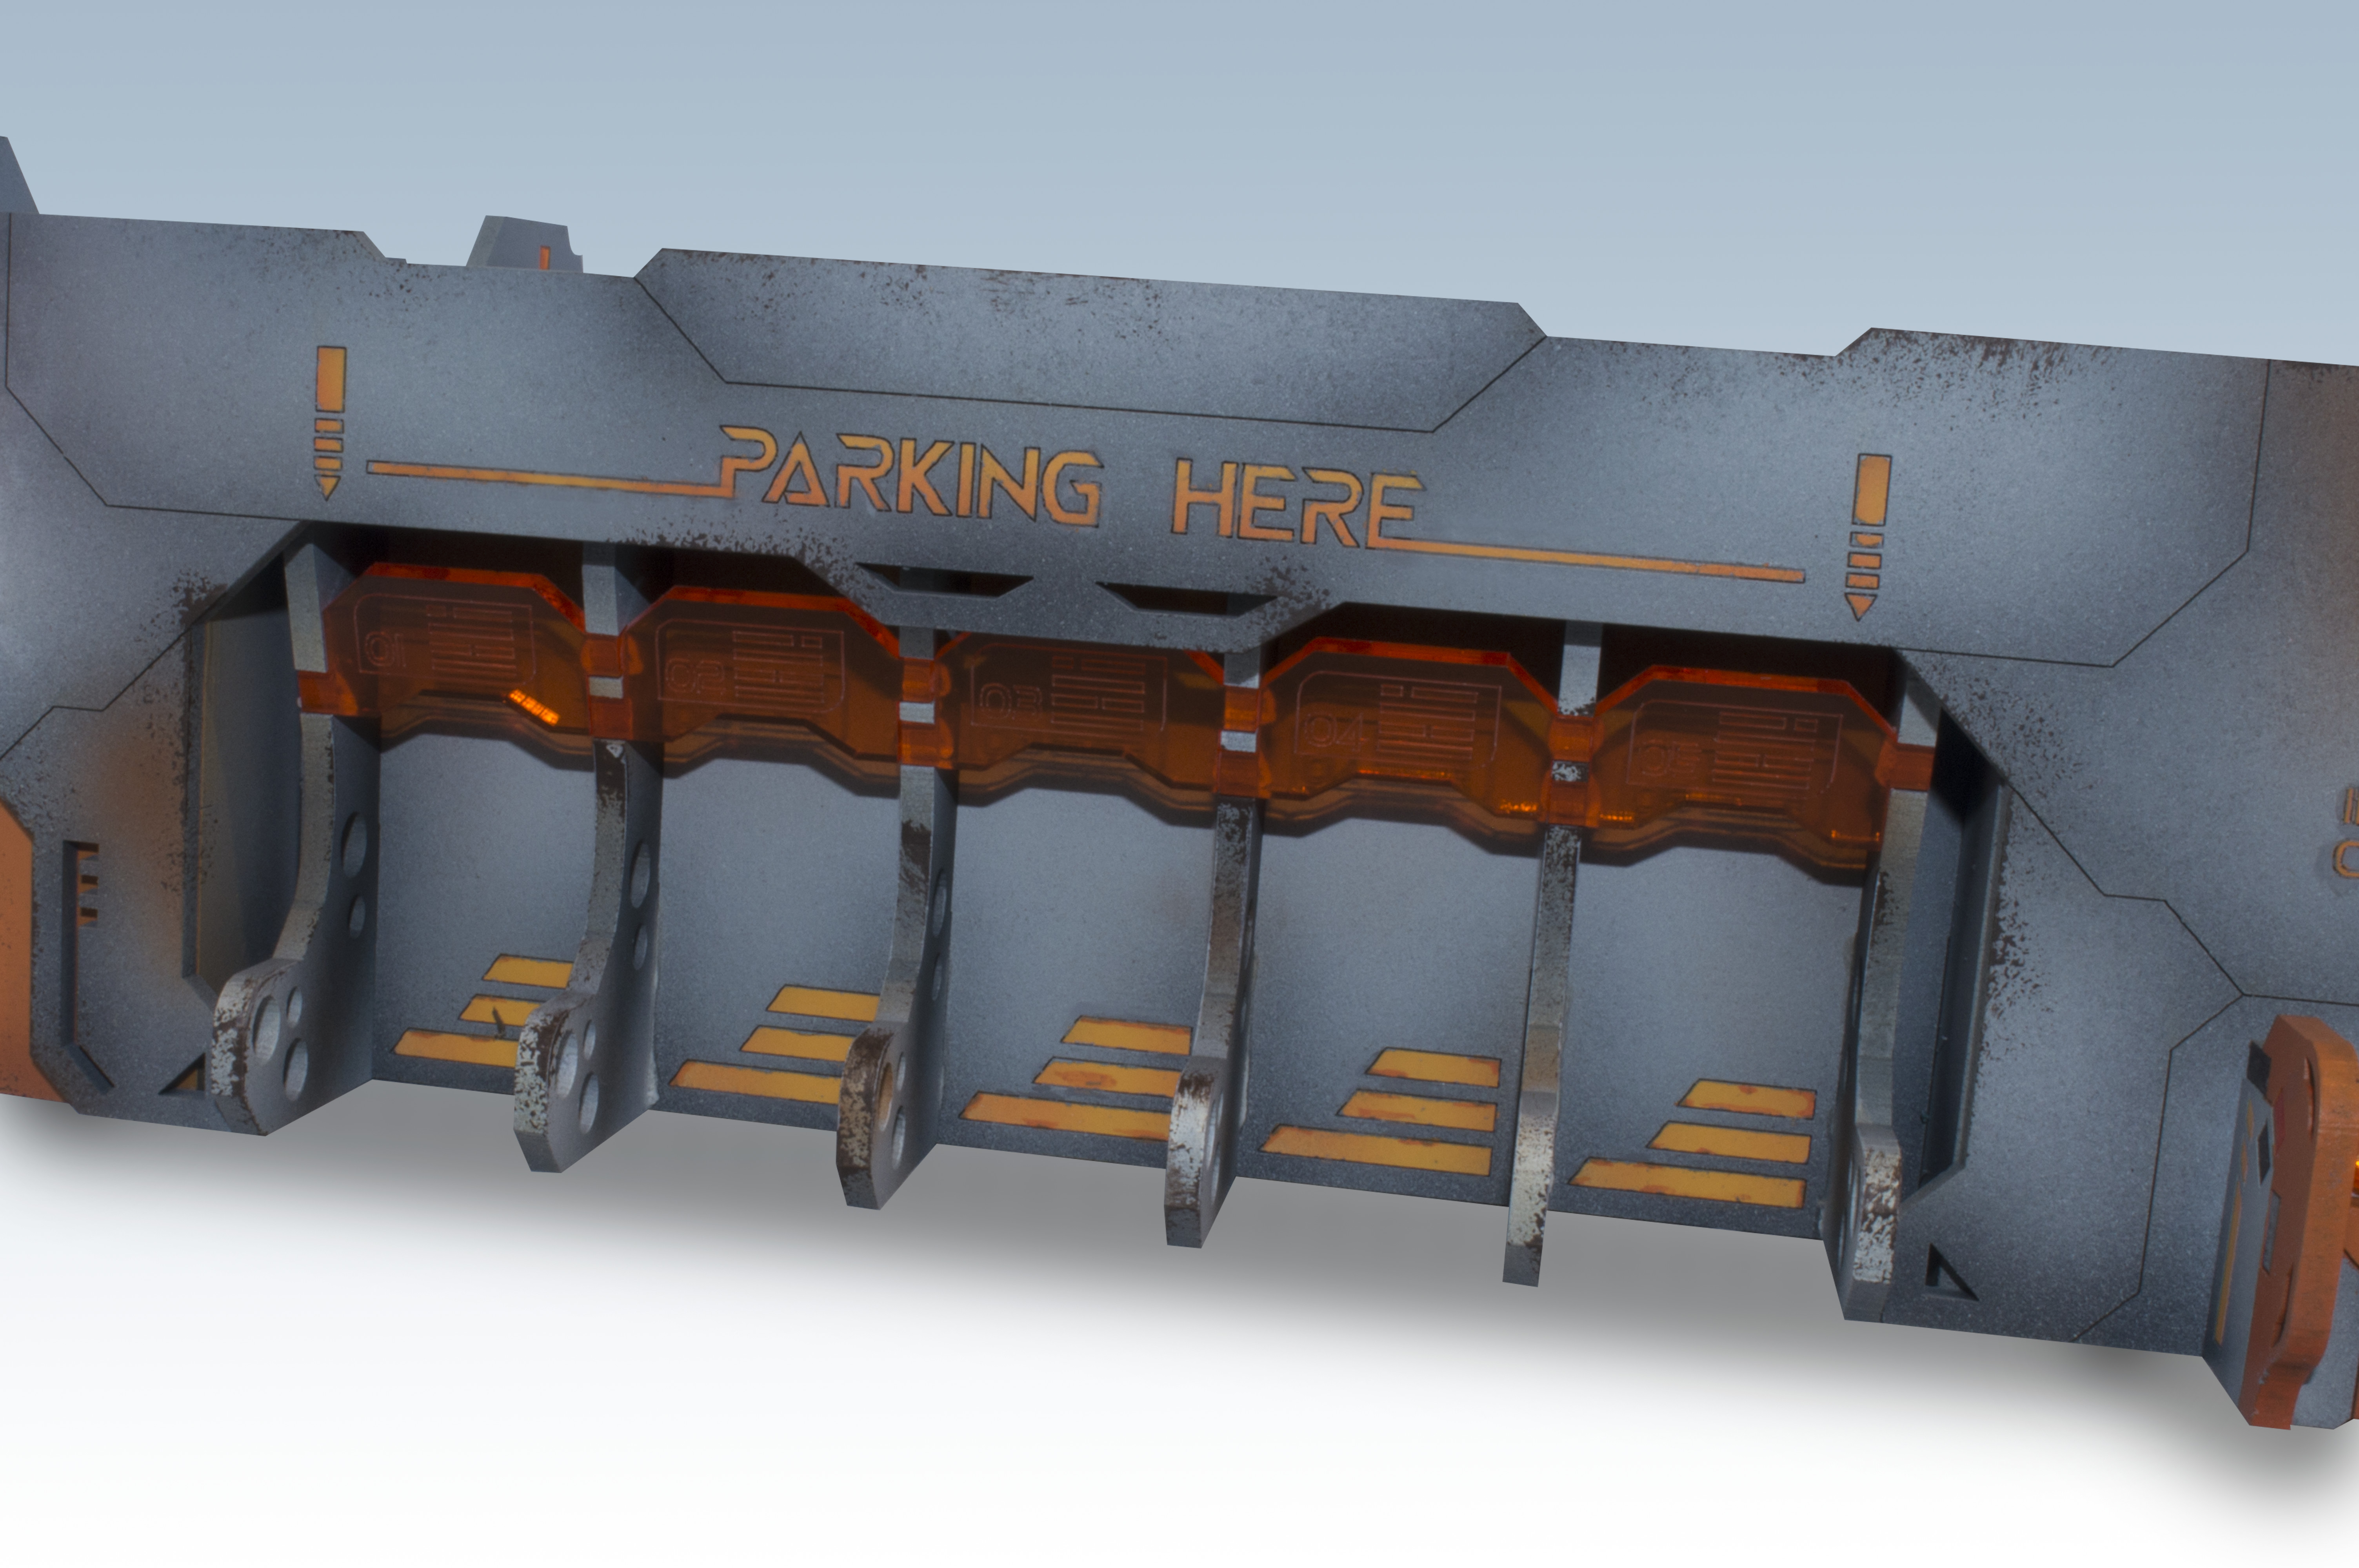
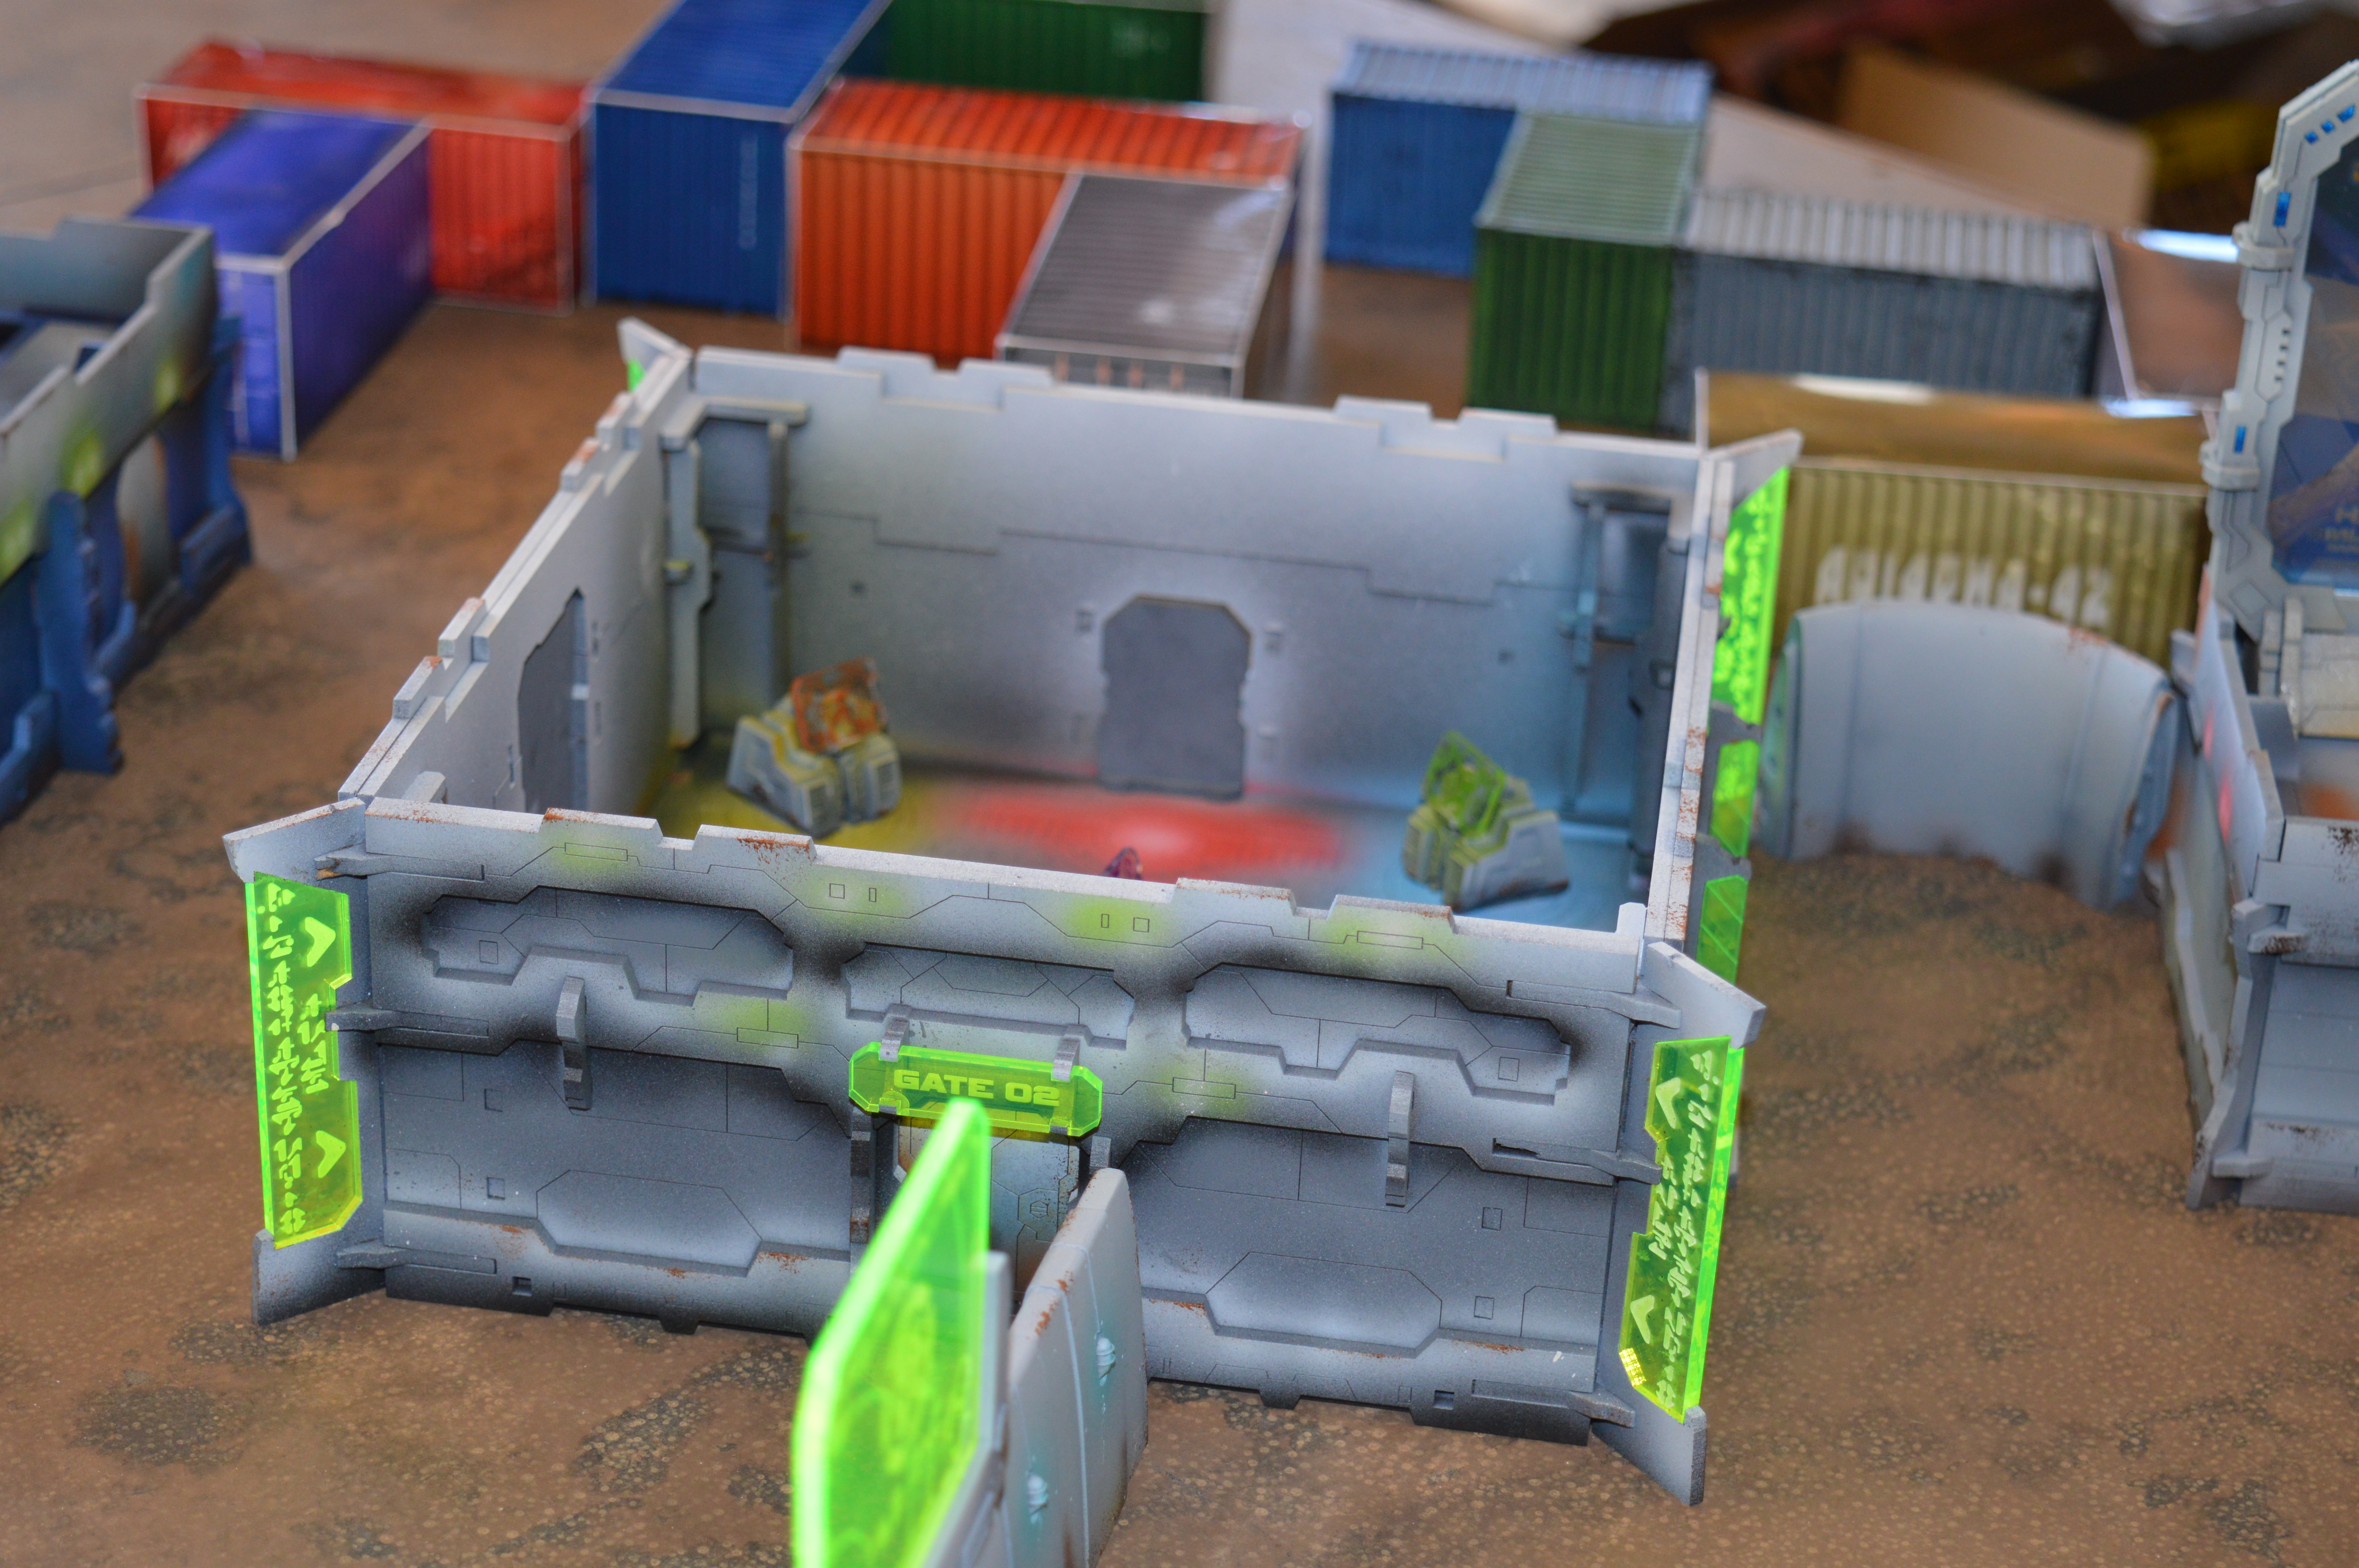
As with all ZEN Terrain buildings, this one is available with or without the internals. If you get it without the internals you get everything below. It comes with acrylic windows, 6 search lights for the angled corners and the entrance hallway. For mine, I have kept the entrance hallway detachable so that you can transport/store it more safely.

Police Station 2 Police Station 5Police Station 6Police StationPolice Station 3 Police Station 4

With the internals you can add this amazing interior to the building:

Police Station Posters Interior 8Police Station Posters 11

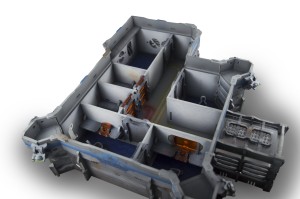
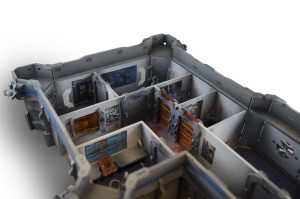
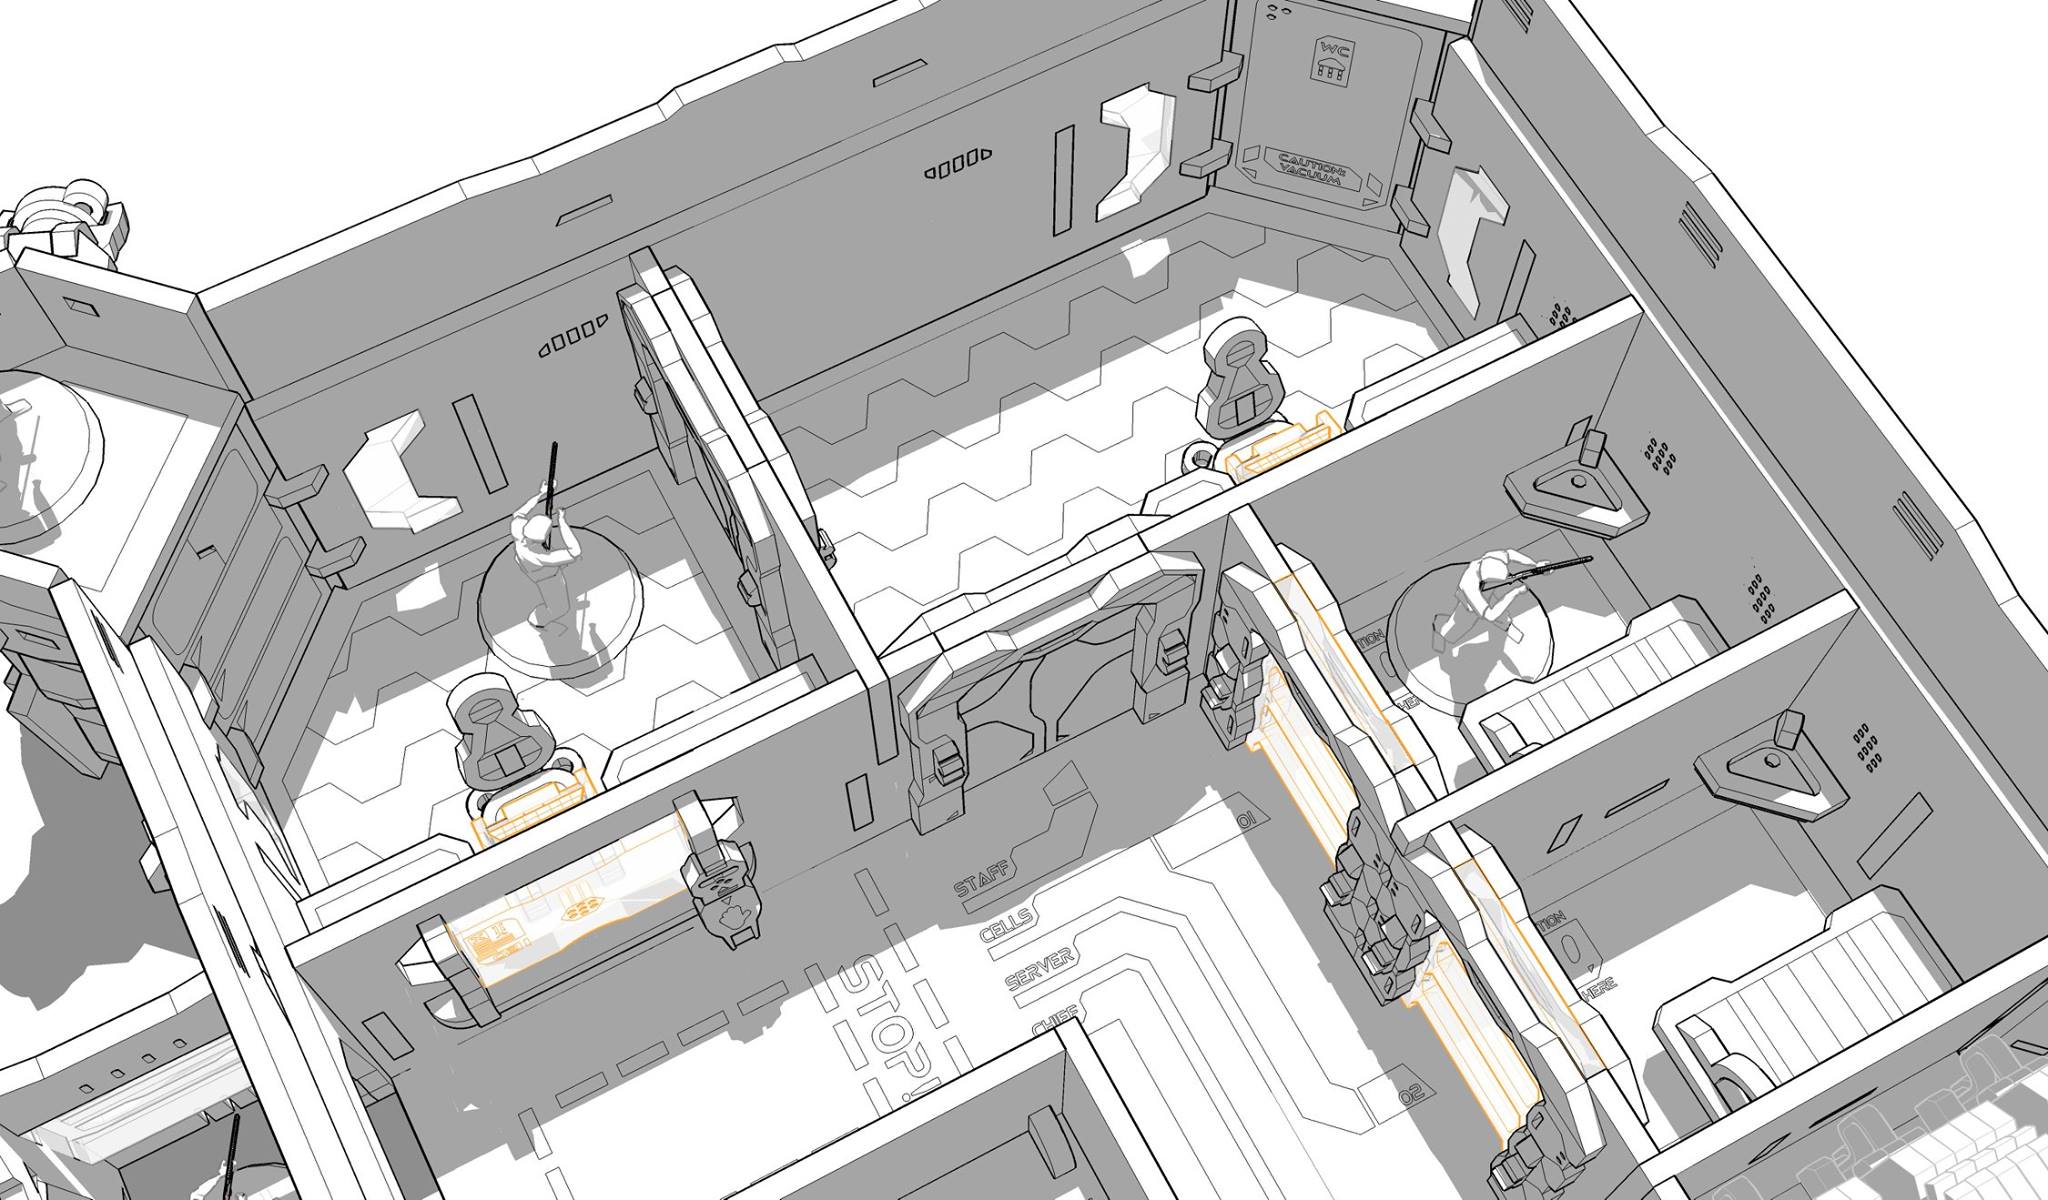
It contains 2 jail cells with beds, wash basins and the laser cell doors

Police Station Posters 2 Police Station Posters 9 Police Station Posters 4Police Station Posters

3 Offices with desks, chairs and acrylic screens and keyboards.

Police Station Posters 5 Police Station Posters 3Police Station Posters 6 Police Station Posters 7   Police Station Posters 10  Police Station Posters 8

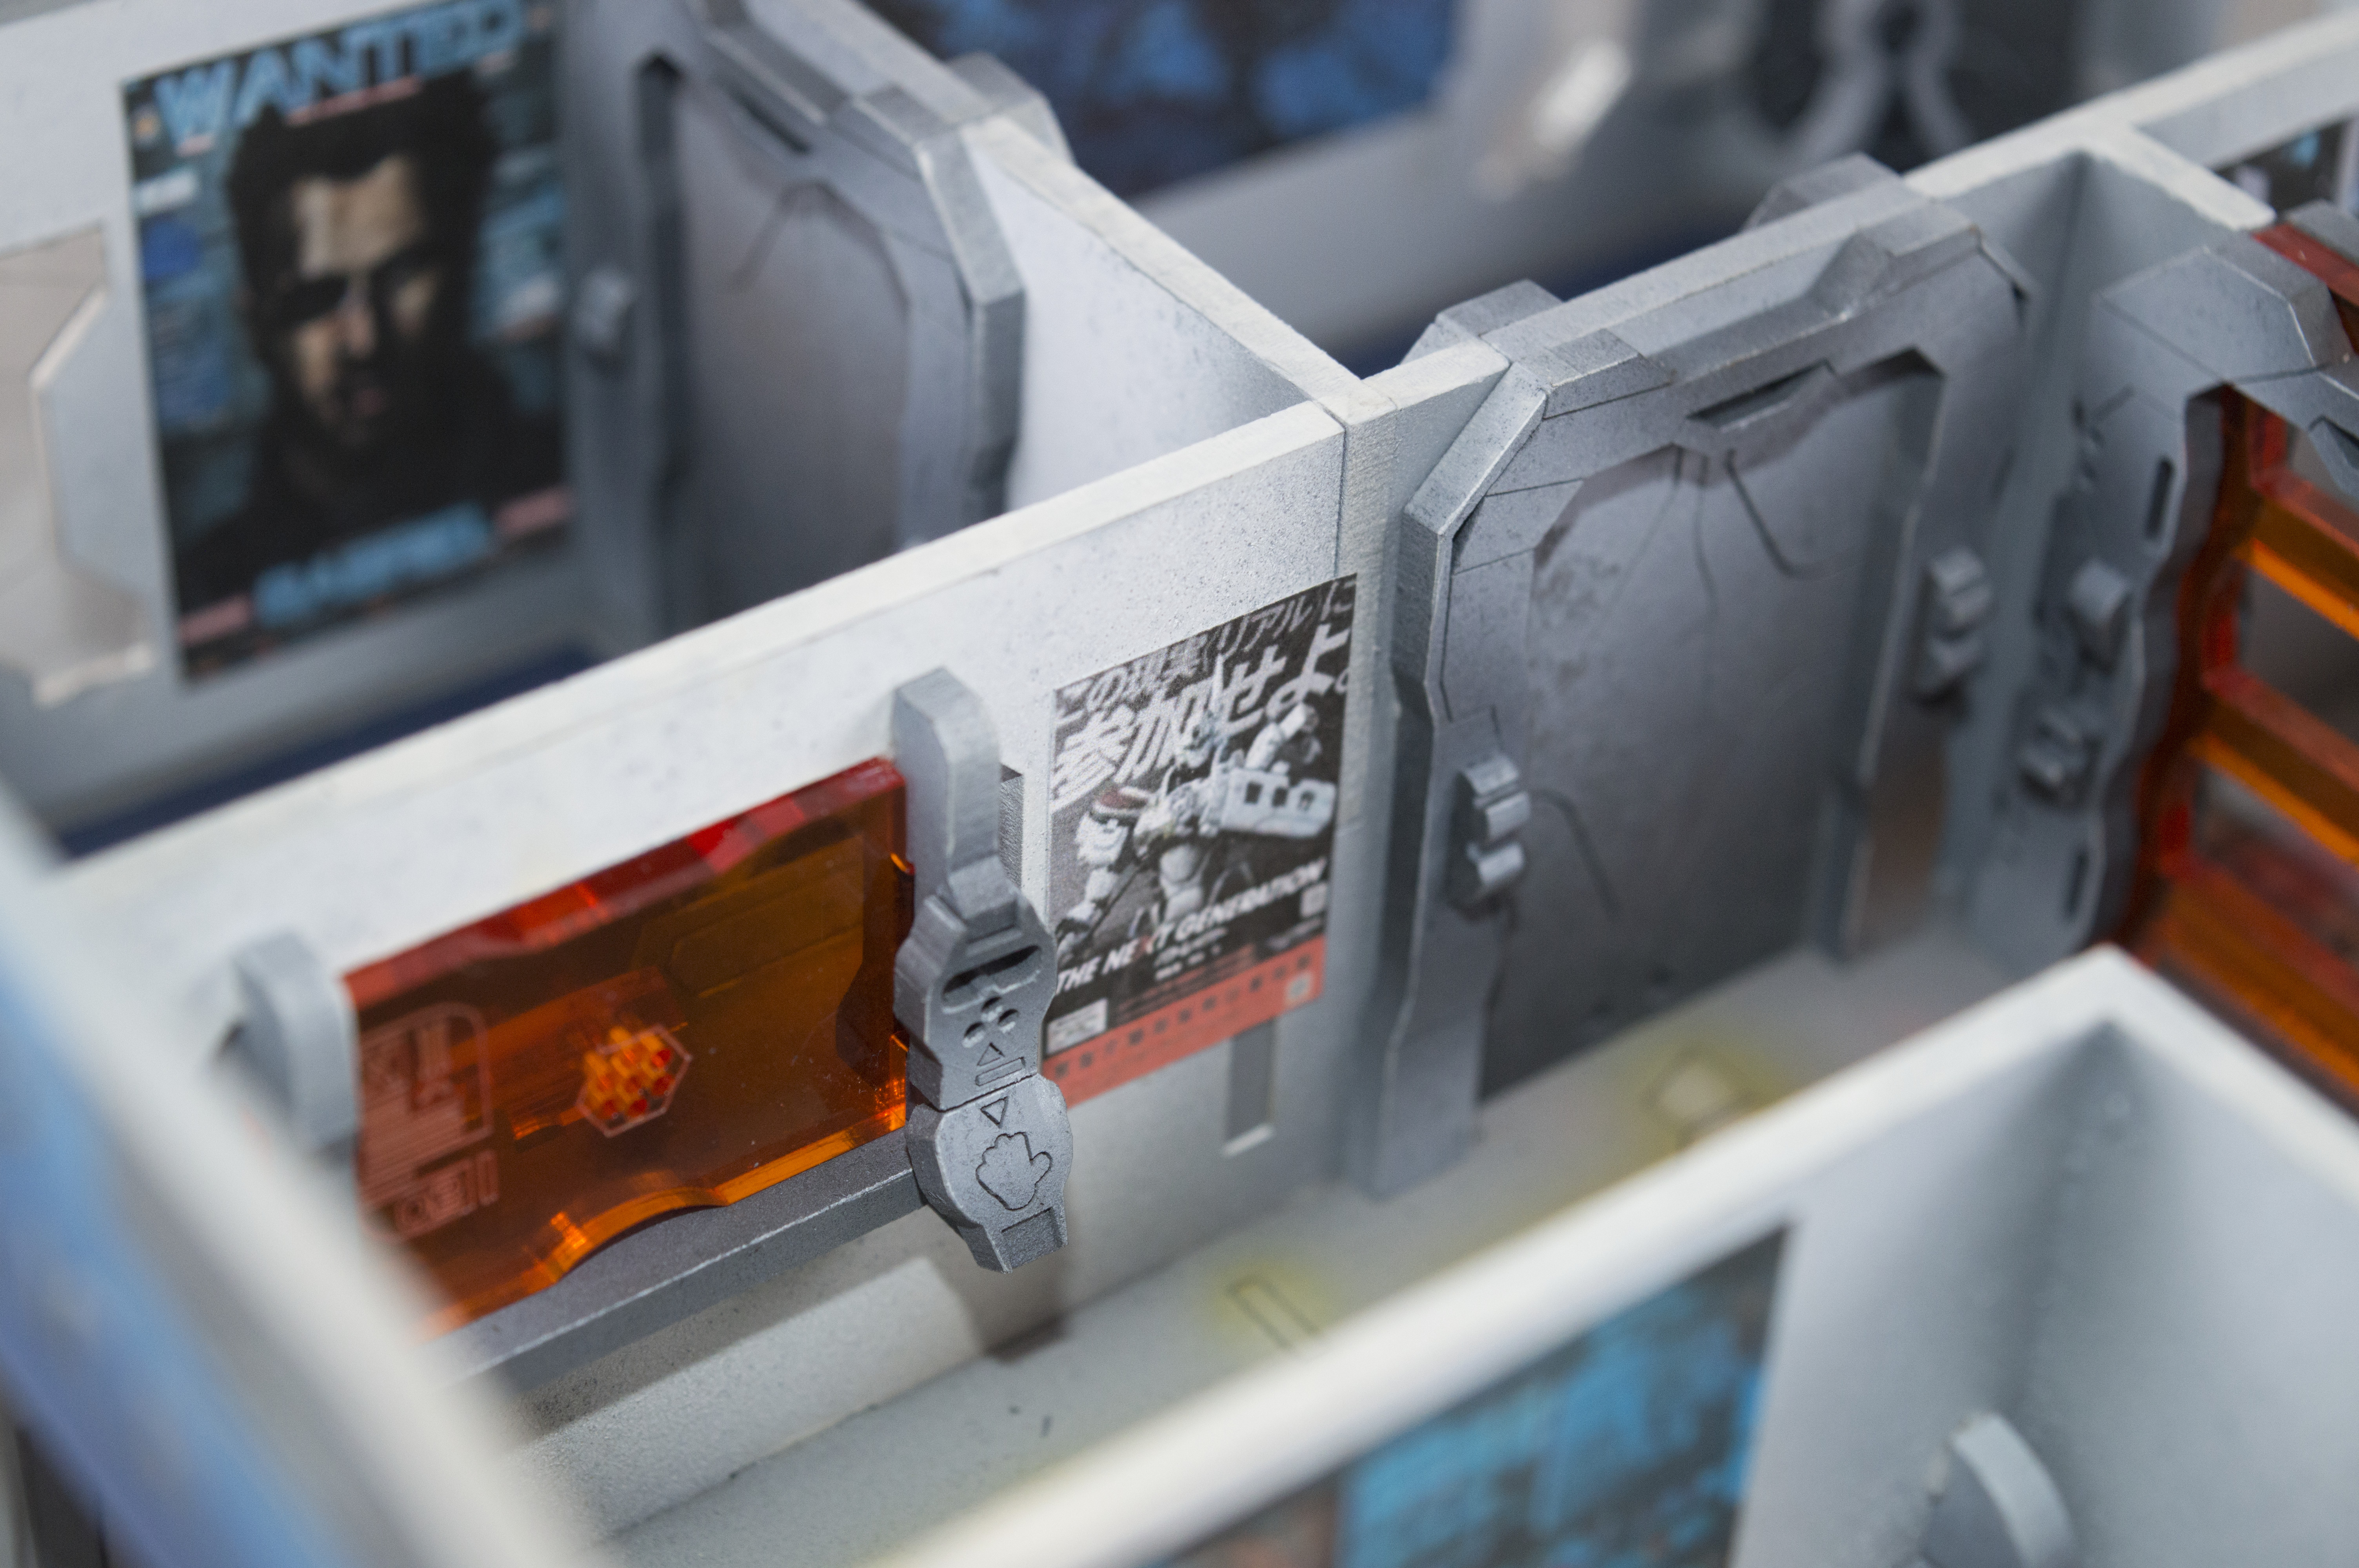
There is also a server room with ventilation which has room for a set of their Server Cluster Objective Markers.

All of the doors can be opened and closed, the roof comes off in 3 pieces so you can access the interior. There are 3 access points on the ground floor, the main entrance, side entrance and the hatch on the rear of the server room. There is also a hatch on the roof with a ladder.

I cannot wait to run a game with 2 HVT’s in the cells and each player has to extract their HVT back to the deployment zone, or an attack and defend game with the same idea of extracting an HVT from the cells. I would personally make it an engineer or a hacker only able to open with a WIP -3 roll or similar.

In terms of paint job, I used my tried and trusted method of using Badger Minitaire Base Grey and Charred stone for shading going toward white for highlights for the external concrete walls.

The blue was masked off (There has to be a faster way to do this!) and painted with Vallejo Dark Prussian Blue – Game Air Magic Blue – Game Air Electric Blue and final highlight of Game Air White

The metallics were done with VMC Black Grey – Neutral Grey – Light Grey  – White

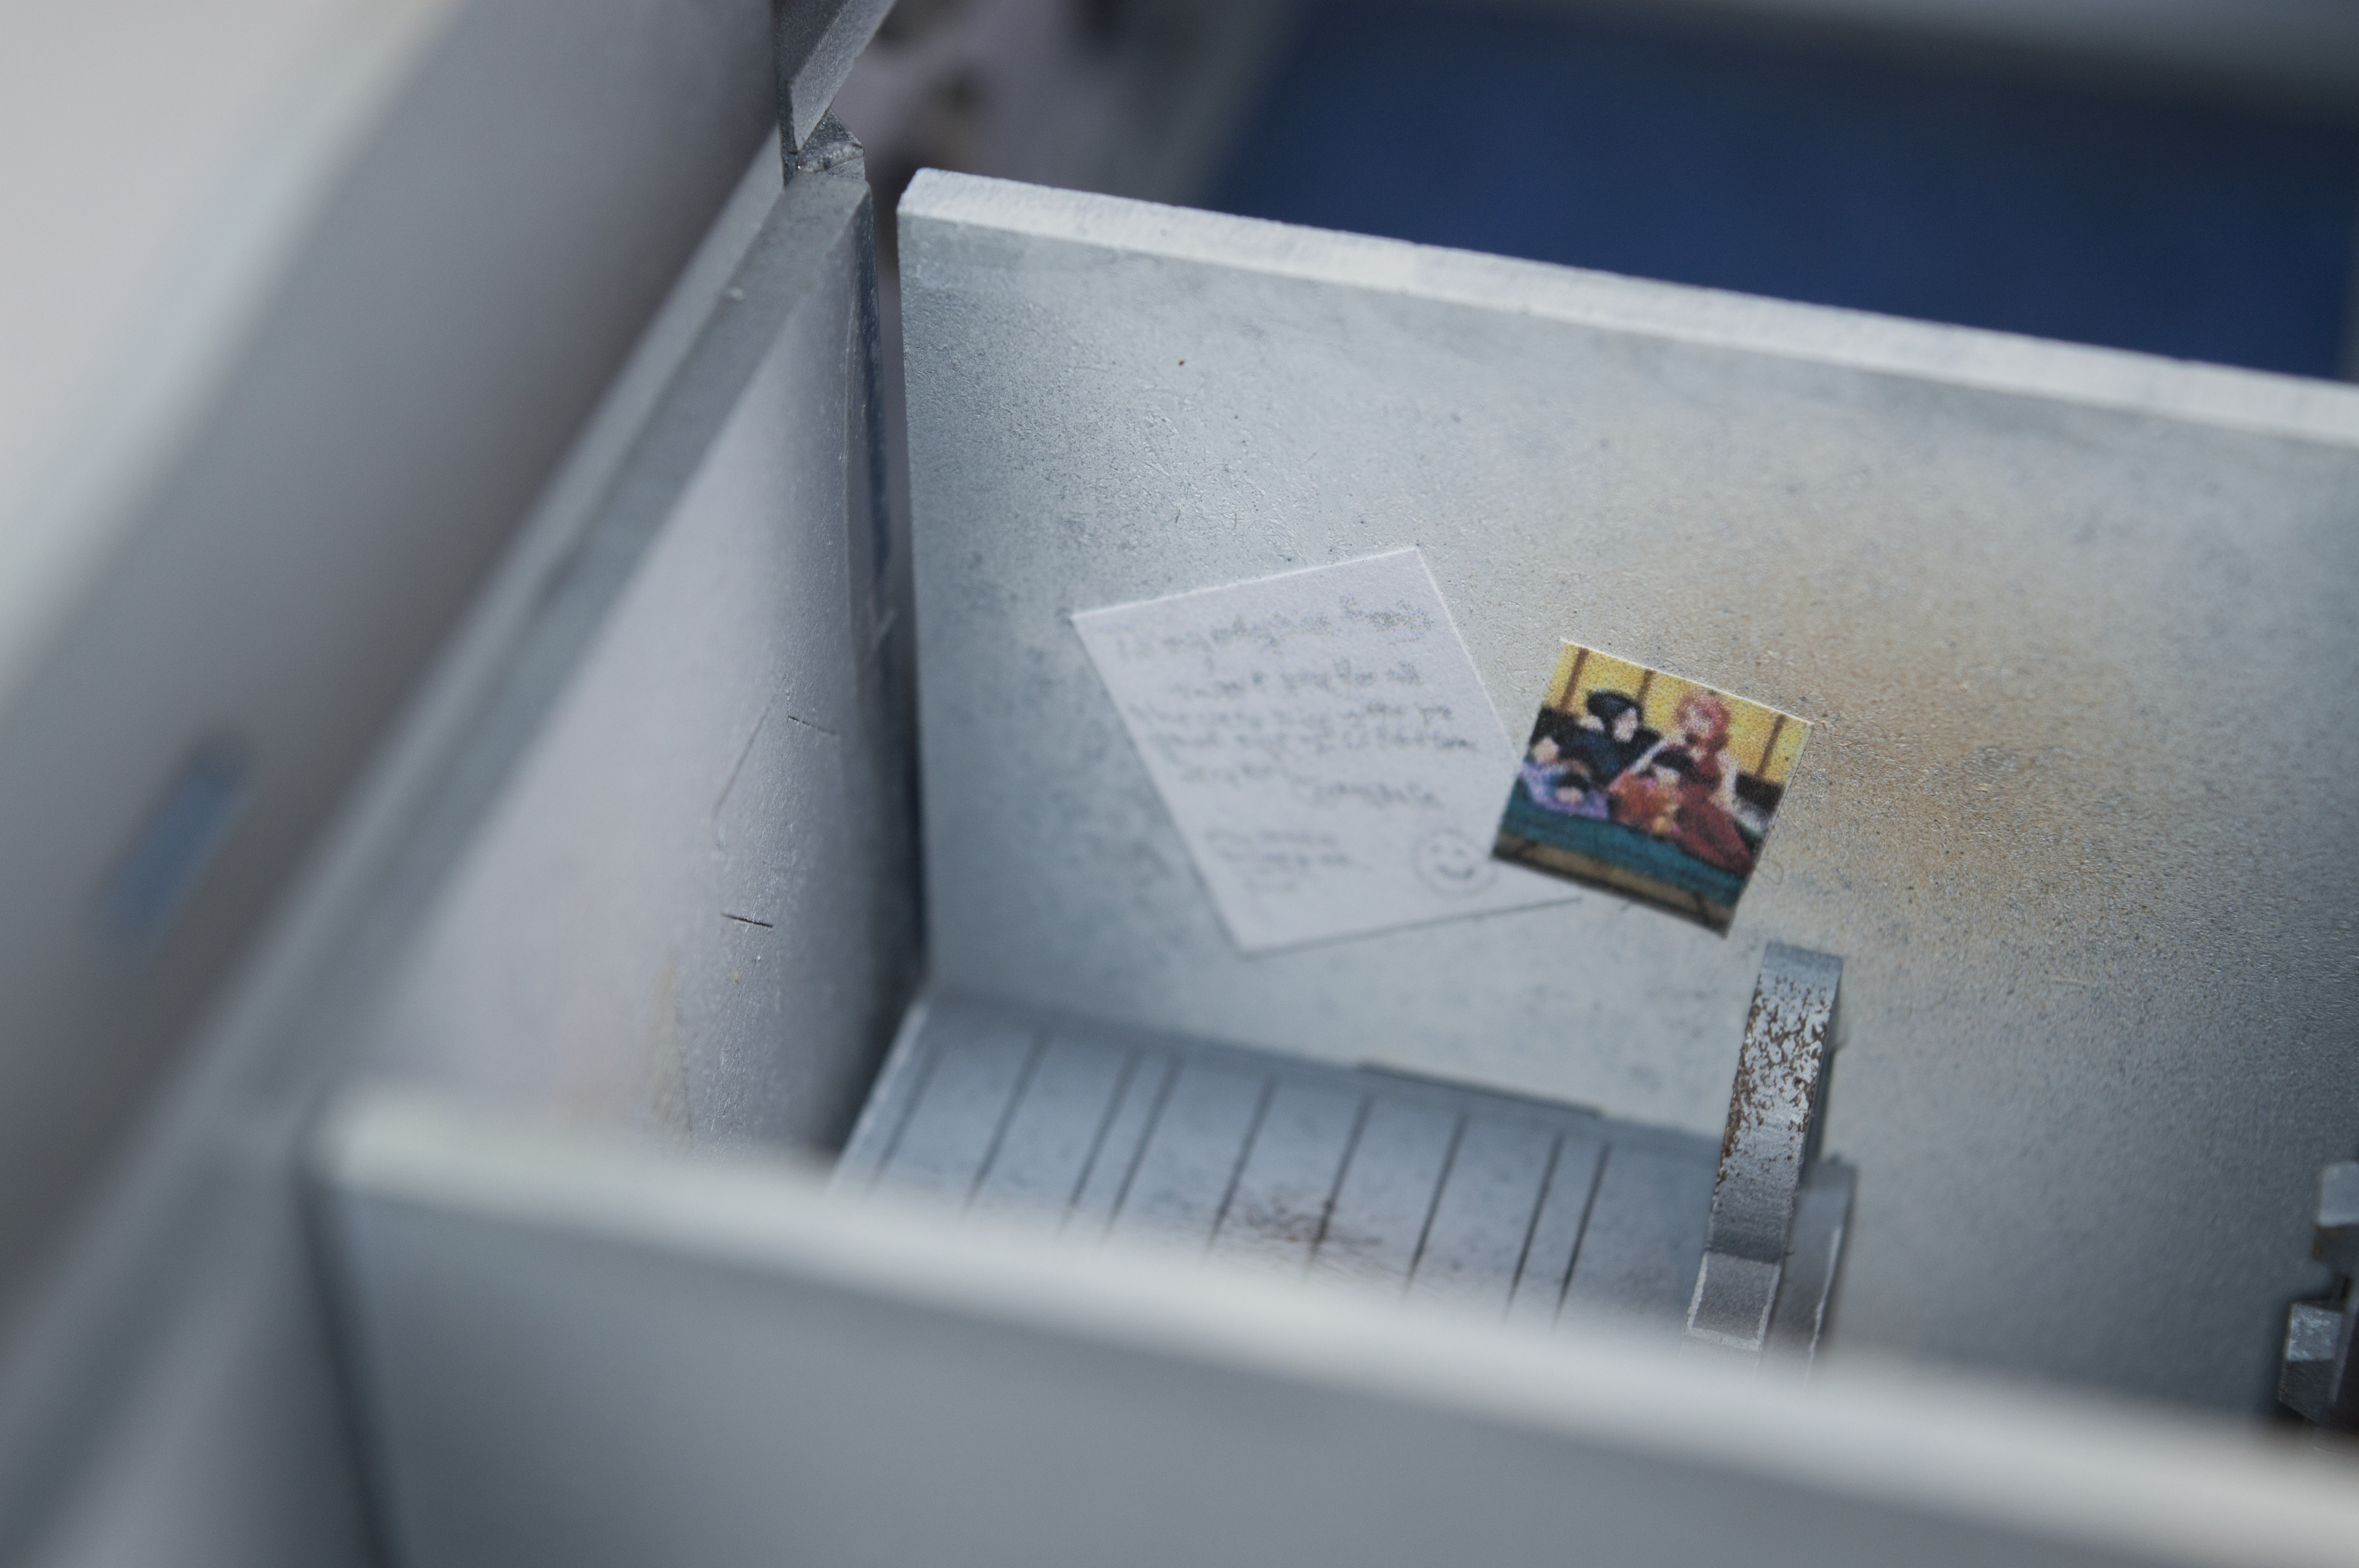
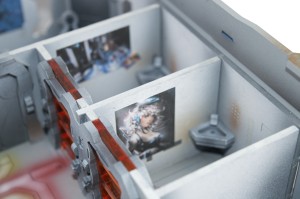
The posters were random images found on google, printed on heavy white paper and stuck to the walls

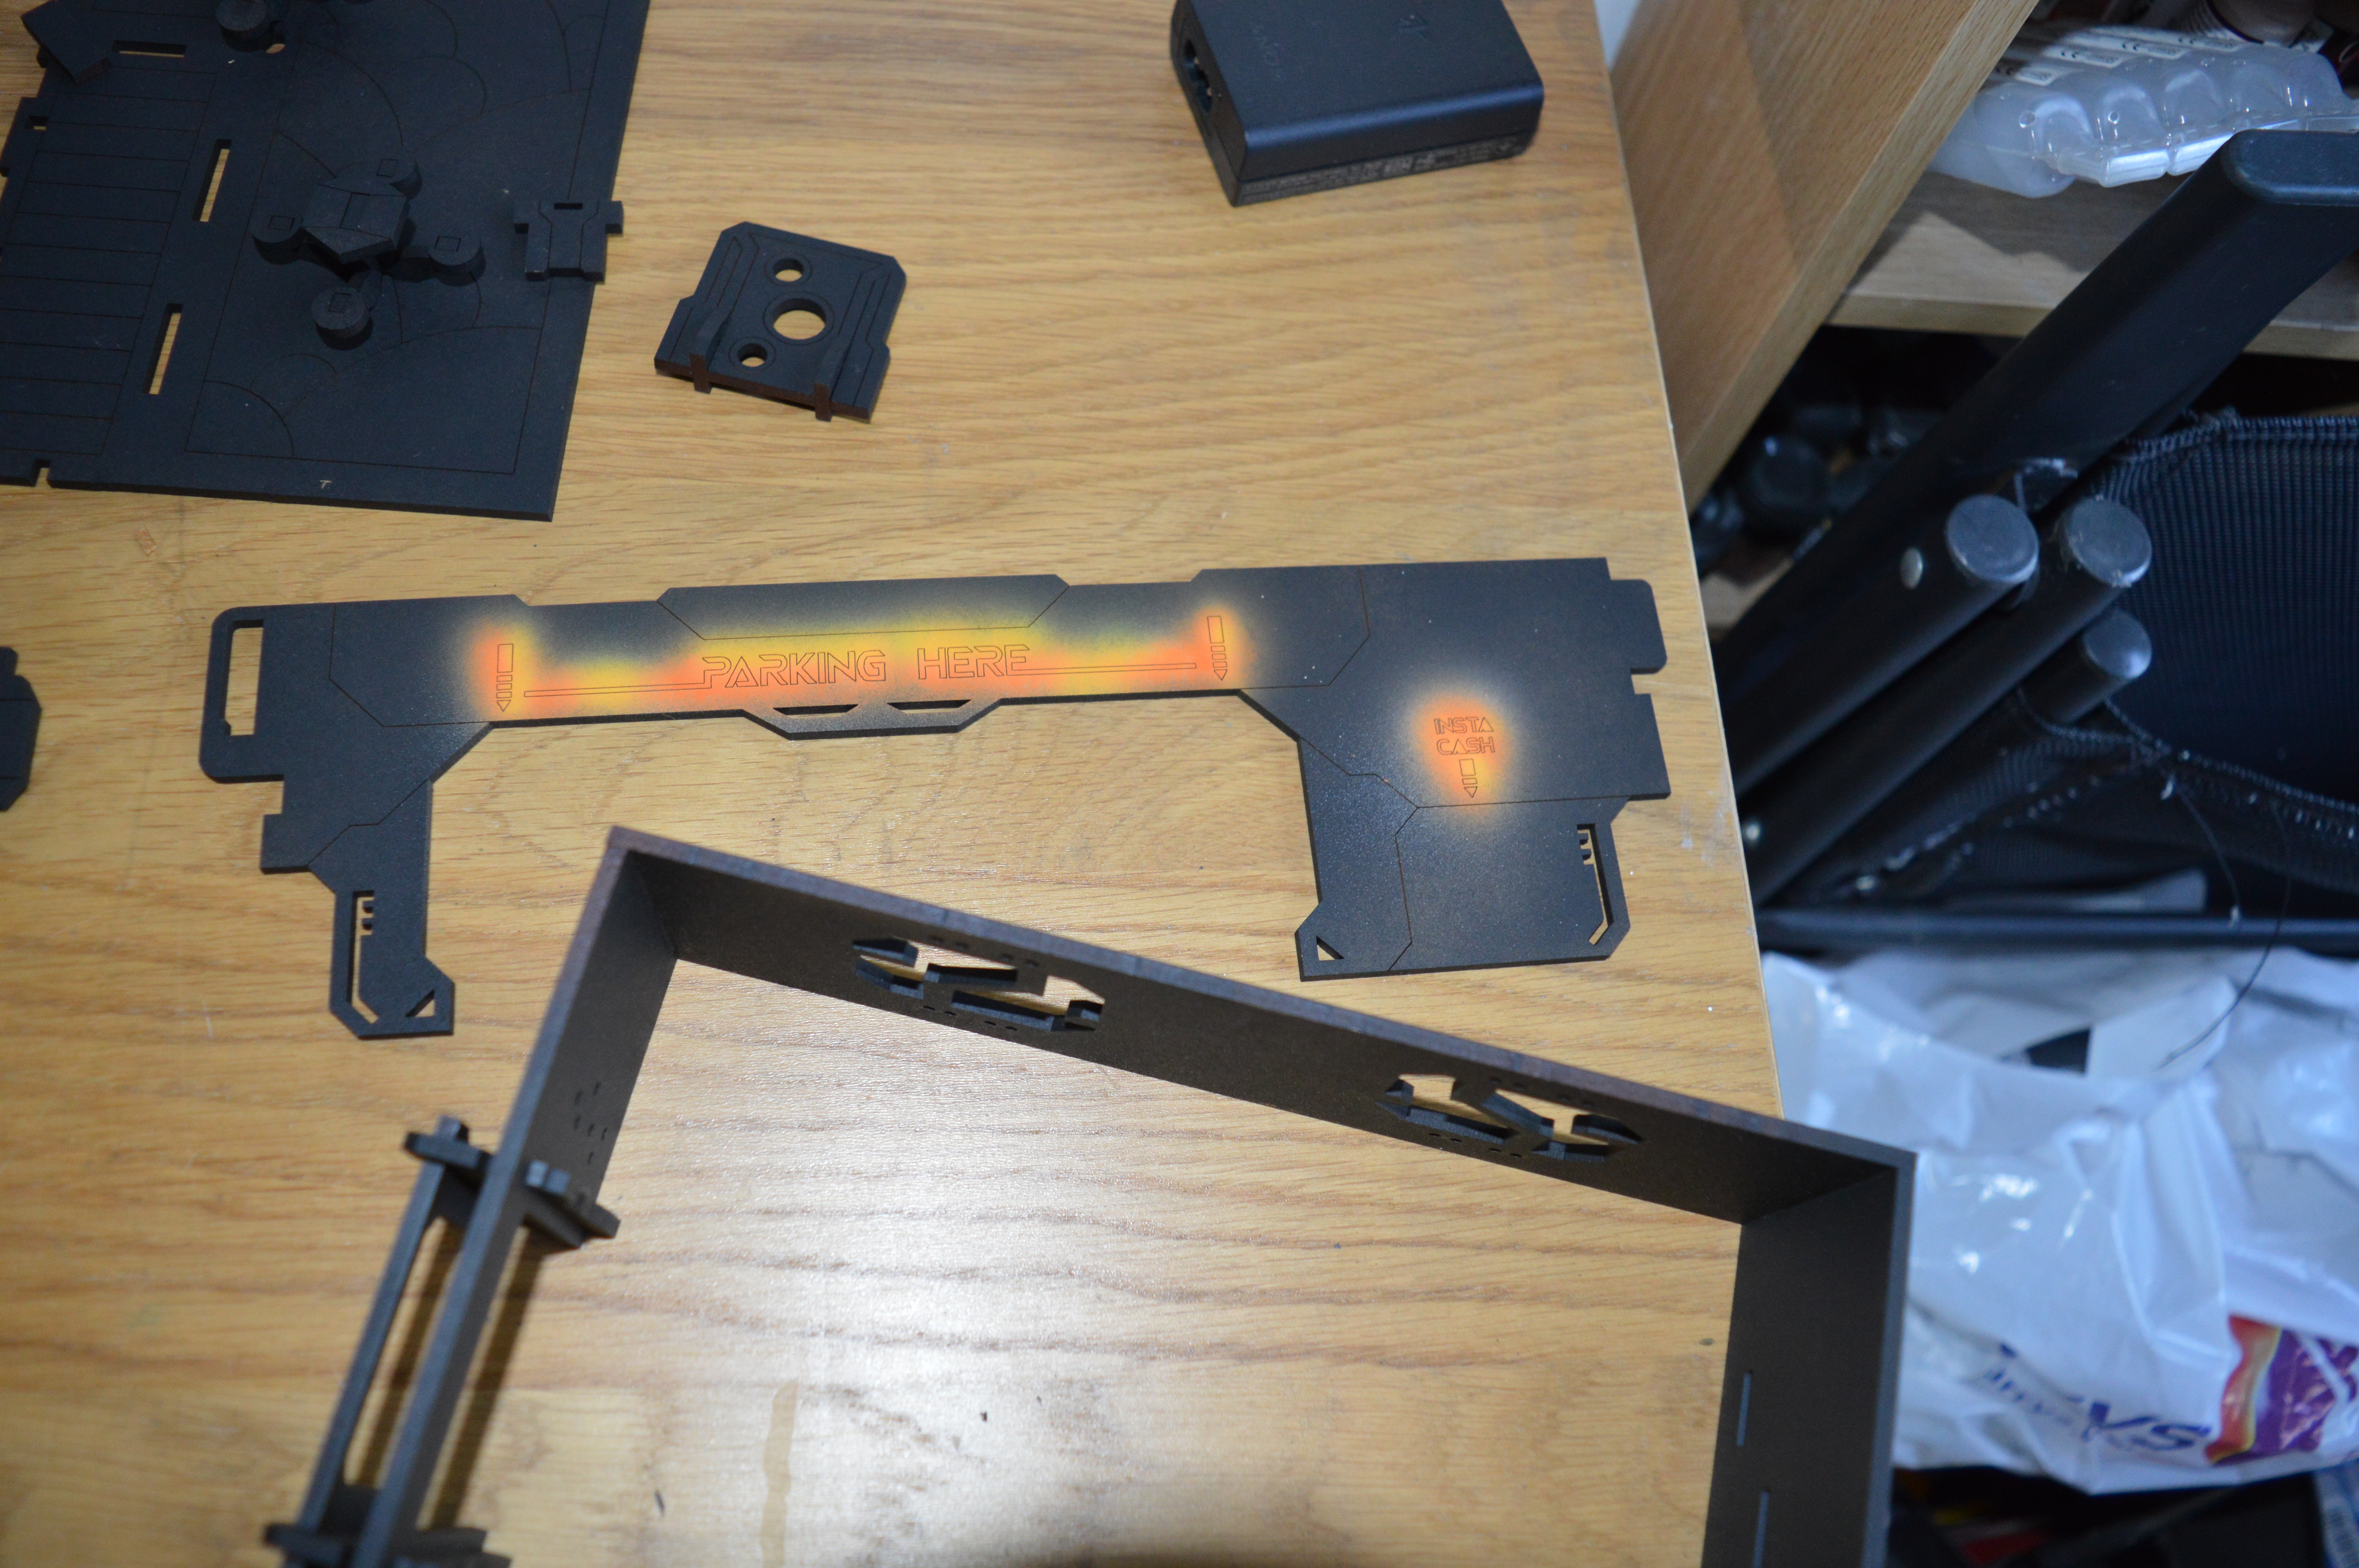
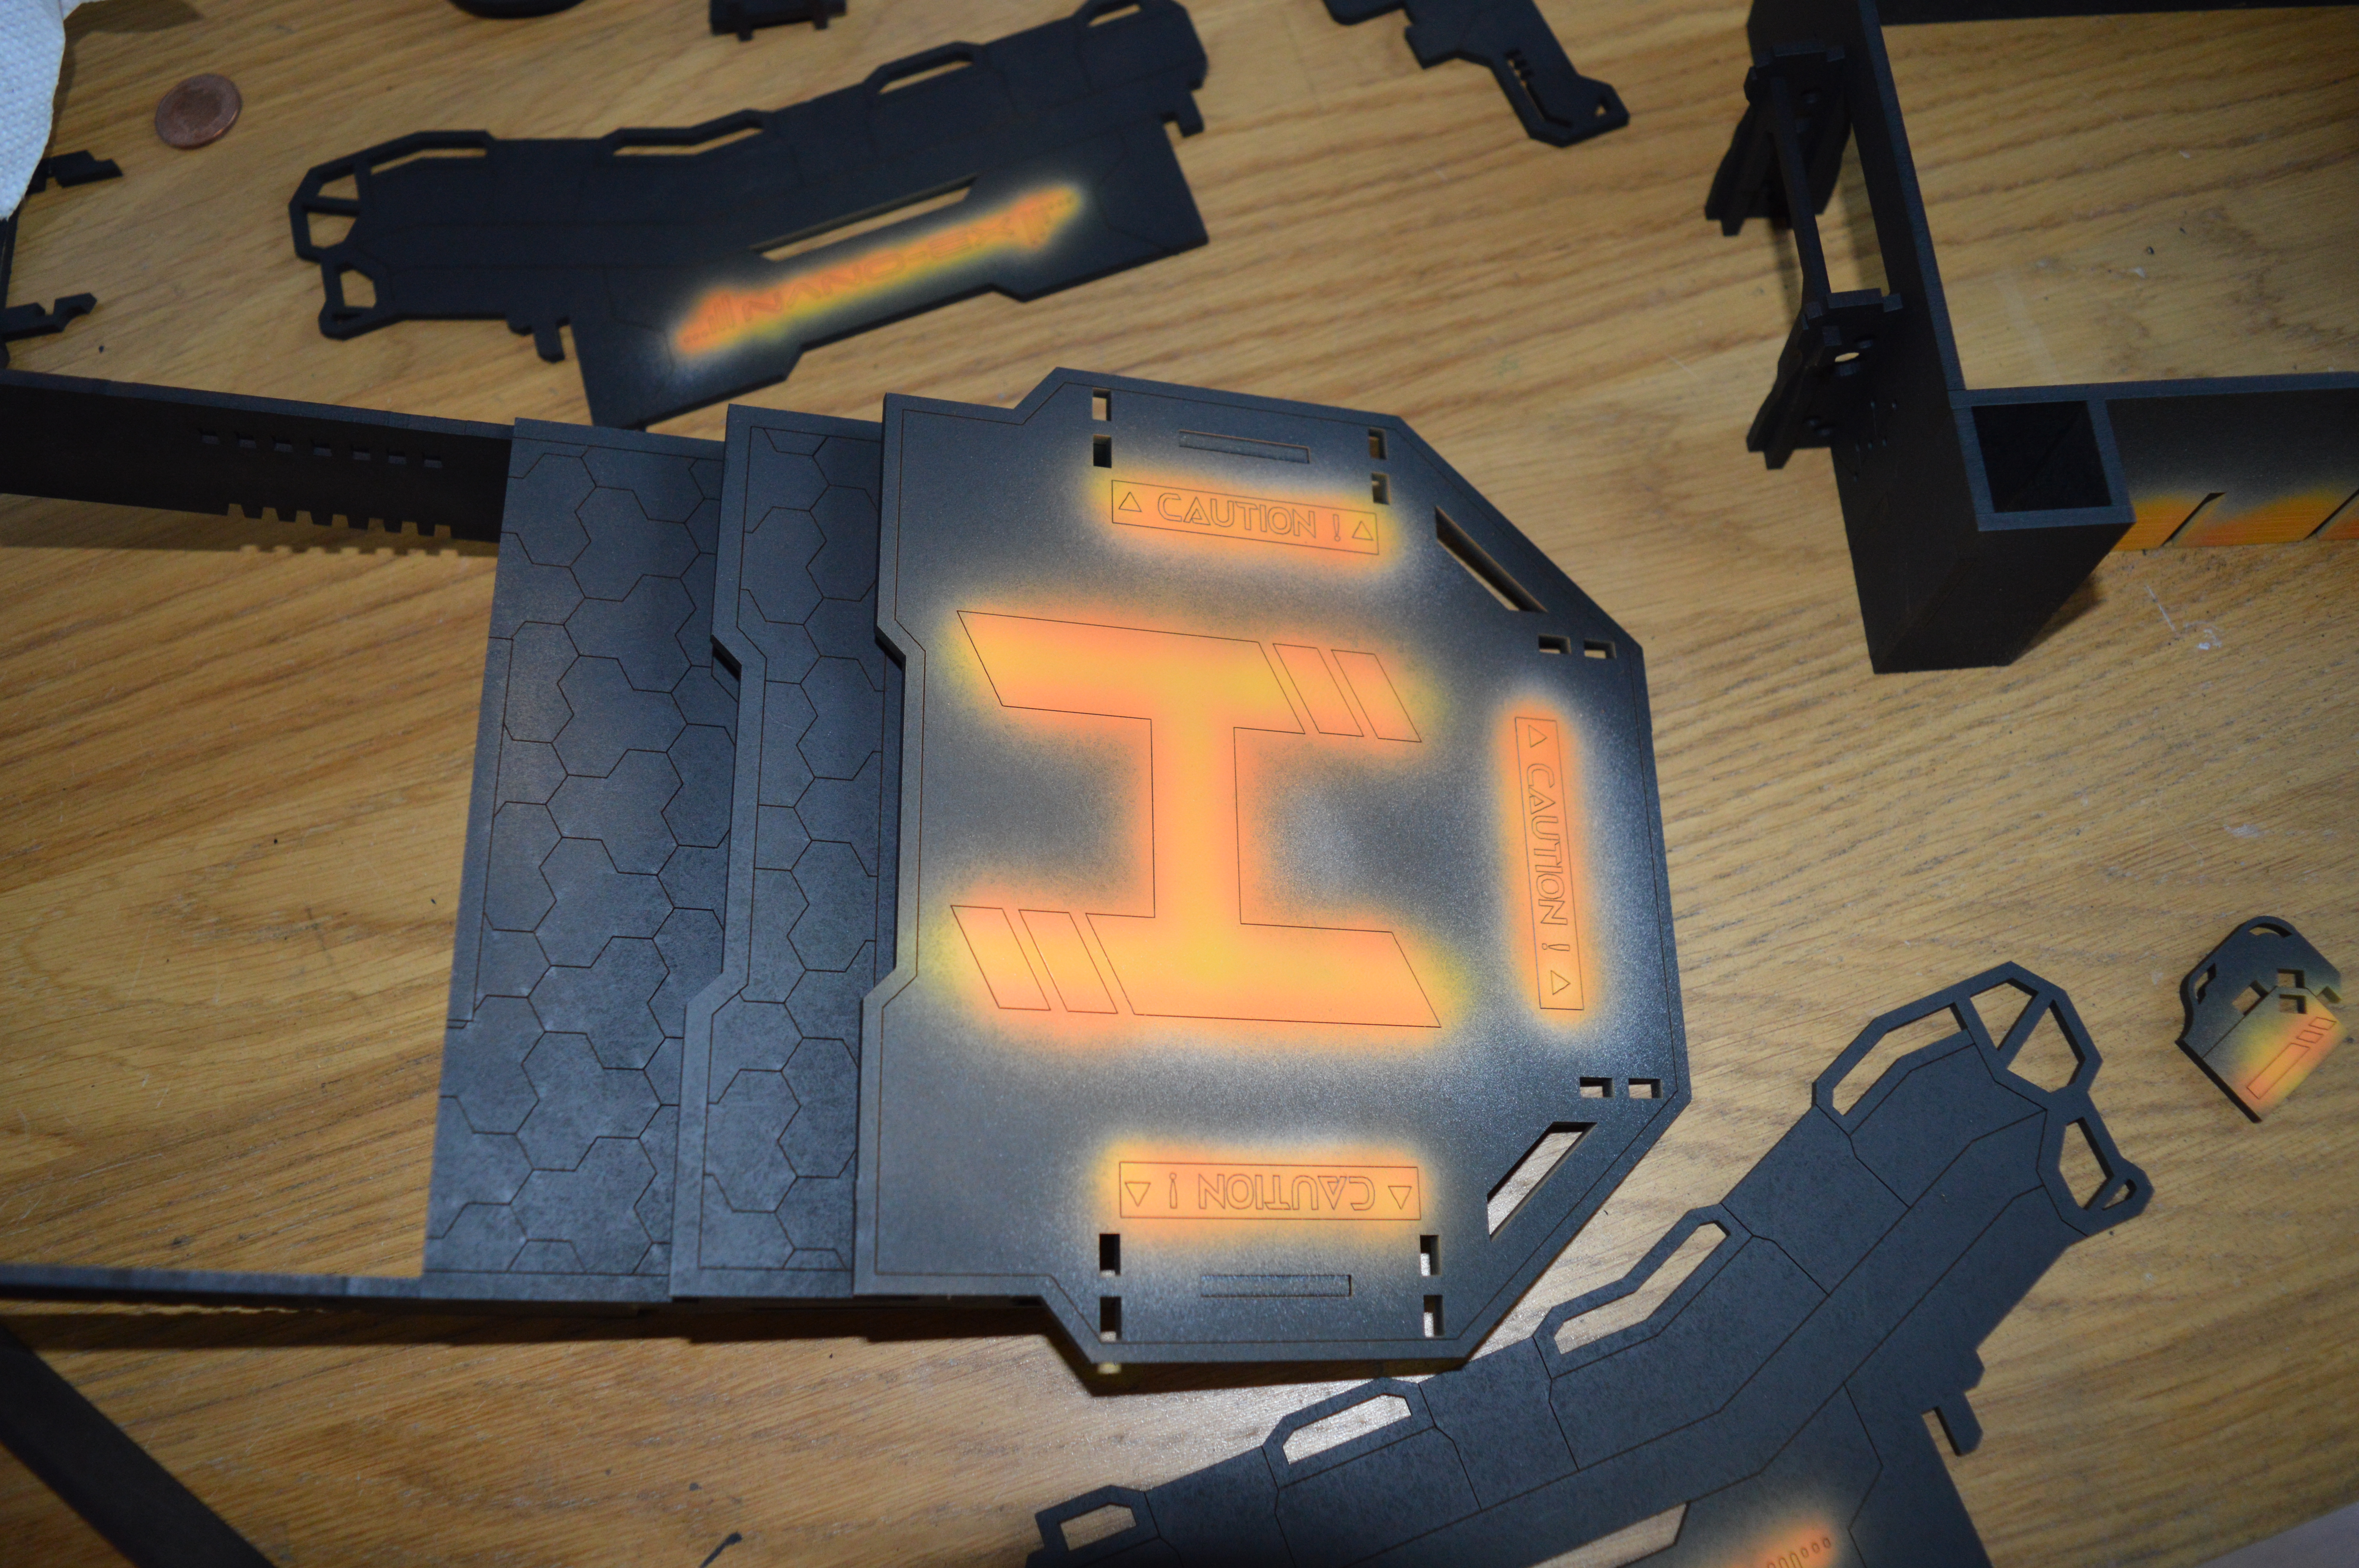
So there you have it – I’ll post some WIP shots later showing the masking process and the sectioned parts.

It’s been a great project to work on and look forward to working on some more of there kit in the future!

It will be available at http://www.zenterrain.com/en_US/index any day now so fill your boots!

Catch you round!

Rich

Hey Everyone,

Since the guys at Zen Terrain have been so kind to send me a prototype of there new Police Station to paint, I thought this would be a good chance to document the process I go through when painting something of this level of complexity.

So the first step is to dry fit everything to see how the fit is and get an idea of what can be assembled properly into sub assemblies before painting.

12122560_10154372304684569_5014445222977282852_n12096429_10154372304799569_7084339034246014918_n12106844_10154372304744569_4087885089556930580_n10670116_10154372304969569_5516758777051861891_n   12107246_10154372304844569_7034440307899180339_n  12143317_10154372304899569_3491452718648810599_n

So this is how it looks after a dry fit. I haven’t constructed the spotlights as they are quite difficult to hold together without glue. As always the fit from Zen is superb and instructions are very easy to follow and very well thought out.

I will say that this is the most complex building they have done to date, and there are lots of very small parts that could be quite fragile and easily lost so make sure you are very careful when taking the pieces out of the bags so you don’t damage or lose the smaller parts.

It would also be a good idea to separate the parts that have multiples to make it easier to find them when constructing.

Again another very easy product to recommend – although I don’t know the final cost of the model, I am sure it will be incredibly good value as always!

Join me over the coming weeks as I take you through the build/paint

Rich

Sorry for the delay guys, between work commitments taking me away from my painting desk for 2 weeks, my compressor dying and being ill it’s been a bit quiet on the painting front.

But not anymore

image

image

A little sneak peak of what is on my desk. It’s very nearly finished, just some touching up and graffiti to do.

I’ll post up some proper pictures as soon as I can work out how to photograph something that big!

http://www.ebay.co.uk/itm/TTCombat-City-Scenics-DCS002-Bank-of-Baltar-/311374577990

Hey again all!

I’ve seen a new product from Zen Terrain     –     The Police Station!!

11879044_916692335043937_1567969255467209057_o 11891874_916692288377275_8863633799417571200_o 11930956_916692308377273_5912955873560351102_o  11893732_916692341710603_1998786721178257259_o11947908_916692388377265_1144371224488577857_o 11952706_916692398377264_6266496644553545450_o

This looks stunning, I can’t wait to get this on the painting table. I will try and take some tutorial images as I go!

As if by magic, I’ve had a chat with the team at Zen and there is a prototype of this on route for me to get painted – keep your eyes peeled!

Rich

It’s that time of the week again, and since my compressor died recently I figured I would get the Warmill Foodbooth 9000 with custom battery box uploaded

So without further ado, here she is

Foodbooth 9000 8

And with the lights on:

Foodbooth 9000 4

And it looks super bright in the dark:

Foodbooth 9000 9

Close up view of the lights in the kitchen:

Foodbooth 9000 3

So the history behind this is as follows – I built, painted and lit this model about 18 months – 2 years ago. I loved the lighting, but I hated that I could see the battery and wiring inside the kitchen (which I was quite happy with the paint work on and really wanted to play inside) So I decided waaaaaay back then to fix this by building a battery box. I then got distracted by other projects and the model got shelved – until now!

The basic box is made out of various thickness plasticard with a thicker material making up the main box, and thinner material making up the detailing. It was all cut out by hand (not perfectly I might add – but that’s why I love laser cut kits!) and constructed on top of a lollipop shaped piece of 3mm ply so that it would be fairly sturdy.

Foodbooth 9000 7

I very quickly realised that if the unit was permanently connected it was certainly going to get damaged at some point so I needed a method of disconnecting the wiring. Looking through old PC parts, I noticed I had a few old 3 pin fan headers and as if by magic, they perfectly fitted the piece of plasticard duct that I was going to use between the 2 parts – it was clearly a sign from above 🙂

I used a Dremel to remove a square off the side of the Foodbooth and mounted one side of the fan header there, and then cut the duct to fit the other side of the fan header. This allowed me to disconnect the battery from the main building and looked pretty cool to boot. I also mounted the switch for the circuit on to the box so I could turn the lights on and off

This is what I ended up with:

Foodbooth 9000 1 Foodbooth 9000 6

After realising how well the fan header worked, I fitted another one to the ceiling wiring so that the roof could be completely removed. I ran the wiring under one of the cookers so it was basically out of sight, and the connector fit down one of the sides.

Foodbooth 9000 2   Foodbooth 9000 5

Overall I’m happy with how this turned out. It’s not my best paintjob as it was painted some time ago, but it looks pretty epic on the table when you turn the lights on. Even better, it now has extra cover on the side for infinity!

I got most of the electronics guides for LEDs resistors etc by looking on google so they weren’t hard to find. The lighting circuit was tested on a small prototype board before being wired in properly to make sure I didn’t blow any LEDs or fry a battery.

Well that’s it for this week, but I did get my new compressor and it is a beast 9 litre tank at 120 PSI, and it makes as much noise as a fridge. Happy days!

20150814_194012

See you all later!

Rich

Let’s have another update shall we?

So, after wanting to throw my bottle of Vallejo Liquid Mask into a pit of hellfire, I have now finished the Zen Terrain Shipping Company Building / Dice Tower. This has 2 levels of walkways surrounded by cover that would be great for snipers in infinity, or a HMG in the middle of the board with suppressive fire. It also has a helipad with limited cover at the highest point.

But most importantly – the middle of the building is a working dice tower. Throw the dice in there, and they are stopped from flying everywhere by the fenced in section at the bottom. Everyone I know uses building rooftops to roll their dice, now we have a building that has a proper dice tower built in. Bravo Zen Terrain – what an amazing way to add one to the table.

Shipping Container Dice Tower 1 Shipping Container Dice Tower 2 Shipping Container Dice Tower 3 Shipping Container Dice Tower 4

To clarify why I now want my liquid mask to burn in hellfire – I used lots of it to mask prepainted sections of this model, basically all of the signwriting on the building and the helipad on the roof. IT DIDN’T BLOODY WORK!!!!!! AAAAAGHHHH!!!! This building has been on my desk for weeks as I couldn’t bring myself to sort out the lettering. In the end I cheaped out and turned it all into orange OSL to make it a whole lot quicker. I know some people aren’t a fan, but for my sanity’s sake I had to get the model finished.

These were intended to be photos to show how to use liquid mask, but since it didn’t work they don’t have much of a use. I did however think it could be some use now to show the sub assemblies put together before painting

DSC_0053

Pre spray in white, prior to adding the orange.

DSC_0060DSC_0059DSC_0058DSC_0057DSC_0056DSC_0055DSC_0054

And now for some orange colour to give it the base/glow

DSC_0063DSC_0062 DSC_0061

And adding yellow to shade

DSC_0066 DSC_0065 DSC_0064

And the dreaded liquid mask. If anyone knows a mask that works on MDF or an idea of where I went wrong, let me know.

DSC_0069 DSC_0068 DSC_0067

I highly recommend that anyone working on this model breaks it into subsections to paint, otherwise you will really struggle to airbrush individual parts without overspraying every other part of the model. It kind of goes without saying, especially on large complex buildings like this one, but it really is key. I think this was broken into 30-40 parts to paint before being put together at the end.

Graffiti is from 00 gauge railway transfers, they are a perfect scale fit for something like this. I was actually looking for the larger 0 gauge transfers, but to be honest I think either will work depending on what you are going to be graffiting.

It took absolutely hours to mask for the turquoise sections. This was done to try and break up the grey concrete like sections and I thought it would play well against the orange of the signs/helipad/elevator.

Speaking of the elevator:

Shipping Container Dice Tower 5 Shipping Container Dice Tower 6

At the back there is a movable elevator that can be at the ground floor or the top floor by pushing the tab at the bottom of the elevator in. If you look at the photo on the left, you can see it pushes 2 tags into a notch that holds it in place. The acrylic section is also removable so you can get miniatures in and out without having to be too creative.

For my games of infinity I intend to make it a short action to call the elevator if it is in the wrong location, and a short move to make it go to the top. I’m pretty sure in N3 there are rules for elevators, but they don’t (correct me if I’m wrong) cover making the elevator travel to where you are if it’s not on your floor – probably because no one has made a movable elevator before now so it has been a bit pointless.

If I’m honest, I wouldn’t be in a rush to make another one of these – not because I don’t like the building, but because it was an exhausting build/paint. I absolutely love this building, and it never fails to get a wow reaction from anyone that sees it. It’s just that a project like this is a real time sink, and it takes some serious determination to get to the end of the build.

It might just be that I’m still a bit sore about the liquid mask, I’ll let you be the judge of that.

Either way it is another fantastic kit from Zen Terrain and a very easy one to recommend – just make sure your table is clear for a couple of weeks to get it done.

It is available to order from here

http://www.zenterrain.com/

See you next week!

Rich

Hey guys and gals!

Sorry it’s been a little while since my last post, life has been a bit hectic, but without further ado, here is the completed Biker Bar from Zen Terrain!

Zen Terrain Hab 2 BikeBar 1 Zen Terrain Hab 2 BikeBar 2 Zen Terrain Hab 2 BikeBar 3 Zen Terrain Hab 2 BikeBar 4

It’s got loads of acrylic parts, in fact, be careful not to drop the girl in the glass orange pieces as they are quite thin and will break easily (as you can see on the left one – I dropped it) but they are easy to repair

View of the bike parking bay

Zen Terrain Hab 2 BikeBar 5

Of course I had to go for the version with the interior- It really makes the building worth going in and fighting over (It’s got nothing to do with it being a strip bar, I promise)

Zen Terrain Hab 2 BikeBar 6 Zen Terrain Hab 2 BikeBar 7

Another absolutely amazing building to work on, Zen really know there stuff and I’m really looking forward to seeing what these guys produce in the next year or so.

You can get this and many other kits from the link below

http://www.zenterrain.com/en_US/index

And what could this be?

Dice Tower Tease

Keep your eyes peeled to see what this comes from!

See you soon!

Rich

Zen Terrain Part 1

Posted: July 22, 2015 in Infinity, Terrain
Tags: , ,

Time for some Zen Terrain!

(Well some of it anyway)

So this is the triple pack of habitats. I decided to go with some brighter, more neon colours this time to see how it would look.

They were painted in sections, keeping the top half of the building separate, so they could be painted metal, whilst the lower half could be done in colour.

As usual, P3 Bloodstone for the rust, and Umbral Umber for the chipping effect. Metallics were done using my normal recipe of 3 shades of grey, plus white and black with a light dusting of turquoise after.

I used a hex stencil from TT Combat for the pattern on the non door side

http://www.ebay.co.uk/itm/Wargames-Imperial-Tau-Marine-Eldar-Hexagonal-Carbon-Fibre-Medium-Stencil-2-/310912909583

And some 00 gauge graffiti transfers for the graffiti. I will point out, make sure you cut as close as possible to the transfer on these sheets, as they will leave a horrible mark around the stencil when they dry as you can see on the purple building. Lesson learned for next time!

HAB 1 All 1 HAB 1 All 2 HAB 1 All 3 HAB 1 All 4

But of course the most important thing with these building is how they stack!

HAB 1 Stack

These are a dream to make/paint, and great value for money. You can pick up their kits from http://www.zenterrain.com/en_US/index

And before I leave, a little tease of what’s left from Zen 🙂

Till next time!

b

Rich

Hey again all! Quick update on the MAS District 5 table I’ve been working on for SWAT. There are still too many papercraft bits on there for my liking, but the club want to get maybe a couple more buildings and some scatter to fill it up a bit more.

DSC_0018 DSC_0020 DSC_0021 DSC_0022 DSC_0023 DSC_0024 DSC_0025 DSC_0026 DSC_0028 DSC_0029 DSC_0030 DSC_0031

We’ve been talking about making one of the buildings a non MAS building as a bit of a ‘useful’ building, so the likes of a medlab or industrial/commercial building to add some flavour to the board. What do you all think we should use? Is there a particular building you think would fit in well with this Micro Arts Studio District 5? I’m thinking maybe a medlab from Zen, but I’d love to get some ideas from the community Next up – some painted Zen kits…… and they are looking awesome!

Later all

Rich

Evening All!

Well look what the Postman delivered………

20150706_080639

Shiny boxes from Zen Terrain!

20150706_080757

Really well packaged with no damage to parts – love the branded box. It’s a small touch but really well executed

20150706_080816

20150706_080902

In the first box we have the HAB residential 3 pack and the biker bar with interior:

20150706_080918

And the epic Dice Tower Shipping Company in the second:

20150706_080934

I still can’t work out how they managed to get all the parts into these plastic bags…. 20150706_081029

Hab 1 Parts – They are all cut completely off the sheets, so no joins to file out or risk of breaking parts taking them off the sheet. Really nice touch, but I do wonder if it might lead to missing parts more often?

20150706_084243

Dry fit of the HAB Residential buildings

20150706_093600

20150706_093612

Instructions are really clear – they make sure they mark where an item may look symmetrical but isn’t20150706_093728

Really, really impressed with this kit so far. It’s cheaper than MAS, but a much higher standard of product. The fit is just right, not so tight that you break the items, but not too loose so they are a pain to build without falling apart. A lot of thought has obviously gone into this

You can pick up their stuff here

http://www.zenterrain.com/en_US/index

And what’s this???? Another pile of TT Combat stuff to do – lots of new kits in here, so I’ll go through them more when I start to unpack them

20150707_171722

In the meantime I have a huge pile of stuff to get painted so I’ll see you in a few!

Rich